A GPS-tracked mileage log that fills in on its own
Transmitter GPS The car logs every trip, and Kilometrówka.net converts it into a ready-to-use entry in the log. All you have to do is review it and close out the month. Below, we’ll use a sample company to show how this works in practice.
- Transmitter in the car When you order a GPS transmitter from us, each one is assigned to a specific car.
- You drive as usual The transmitter automatically records where the car started, where it went, and how many kilometers it traveled.
- The post appears automatically Each route goes to mileage the right car and month.
- Check and close At the end of the month, you review the entries, print them, or download a PDF.
The routes are automatically added to the mileage log
You don't have to write anything down or remember to record the odometer reading. When the car finishes a trip, a new entry appears in the mileage log.
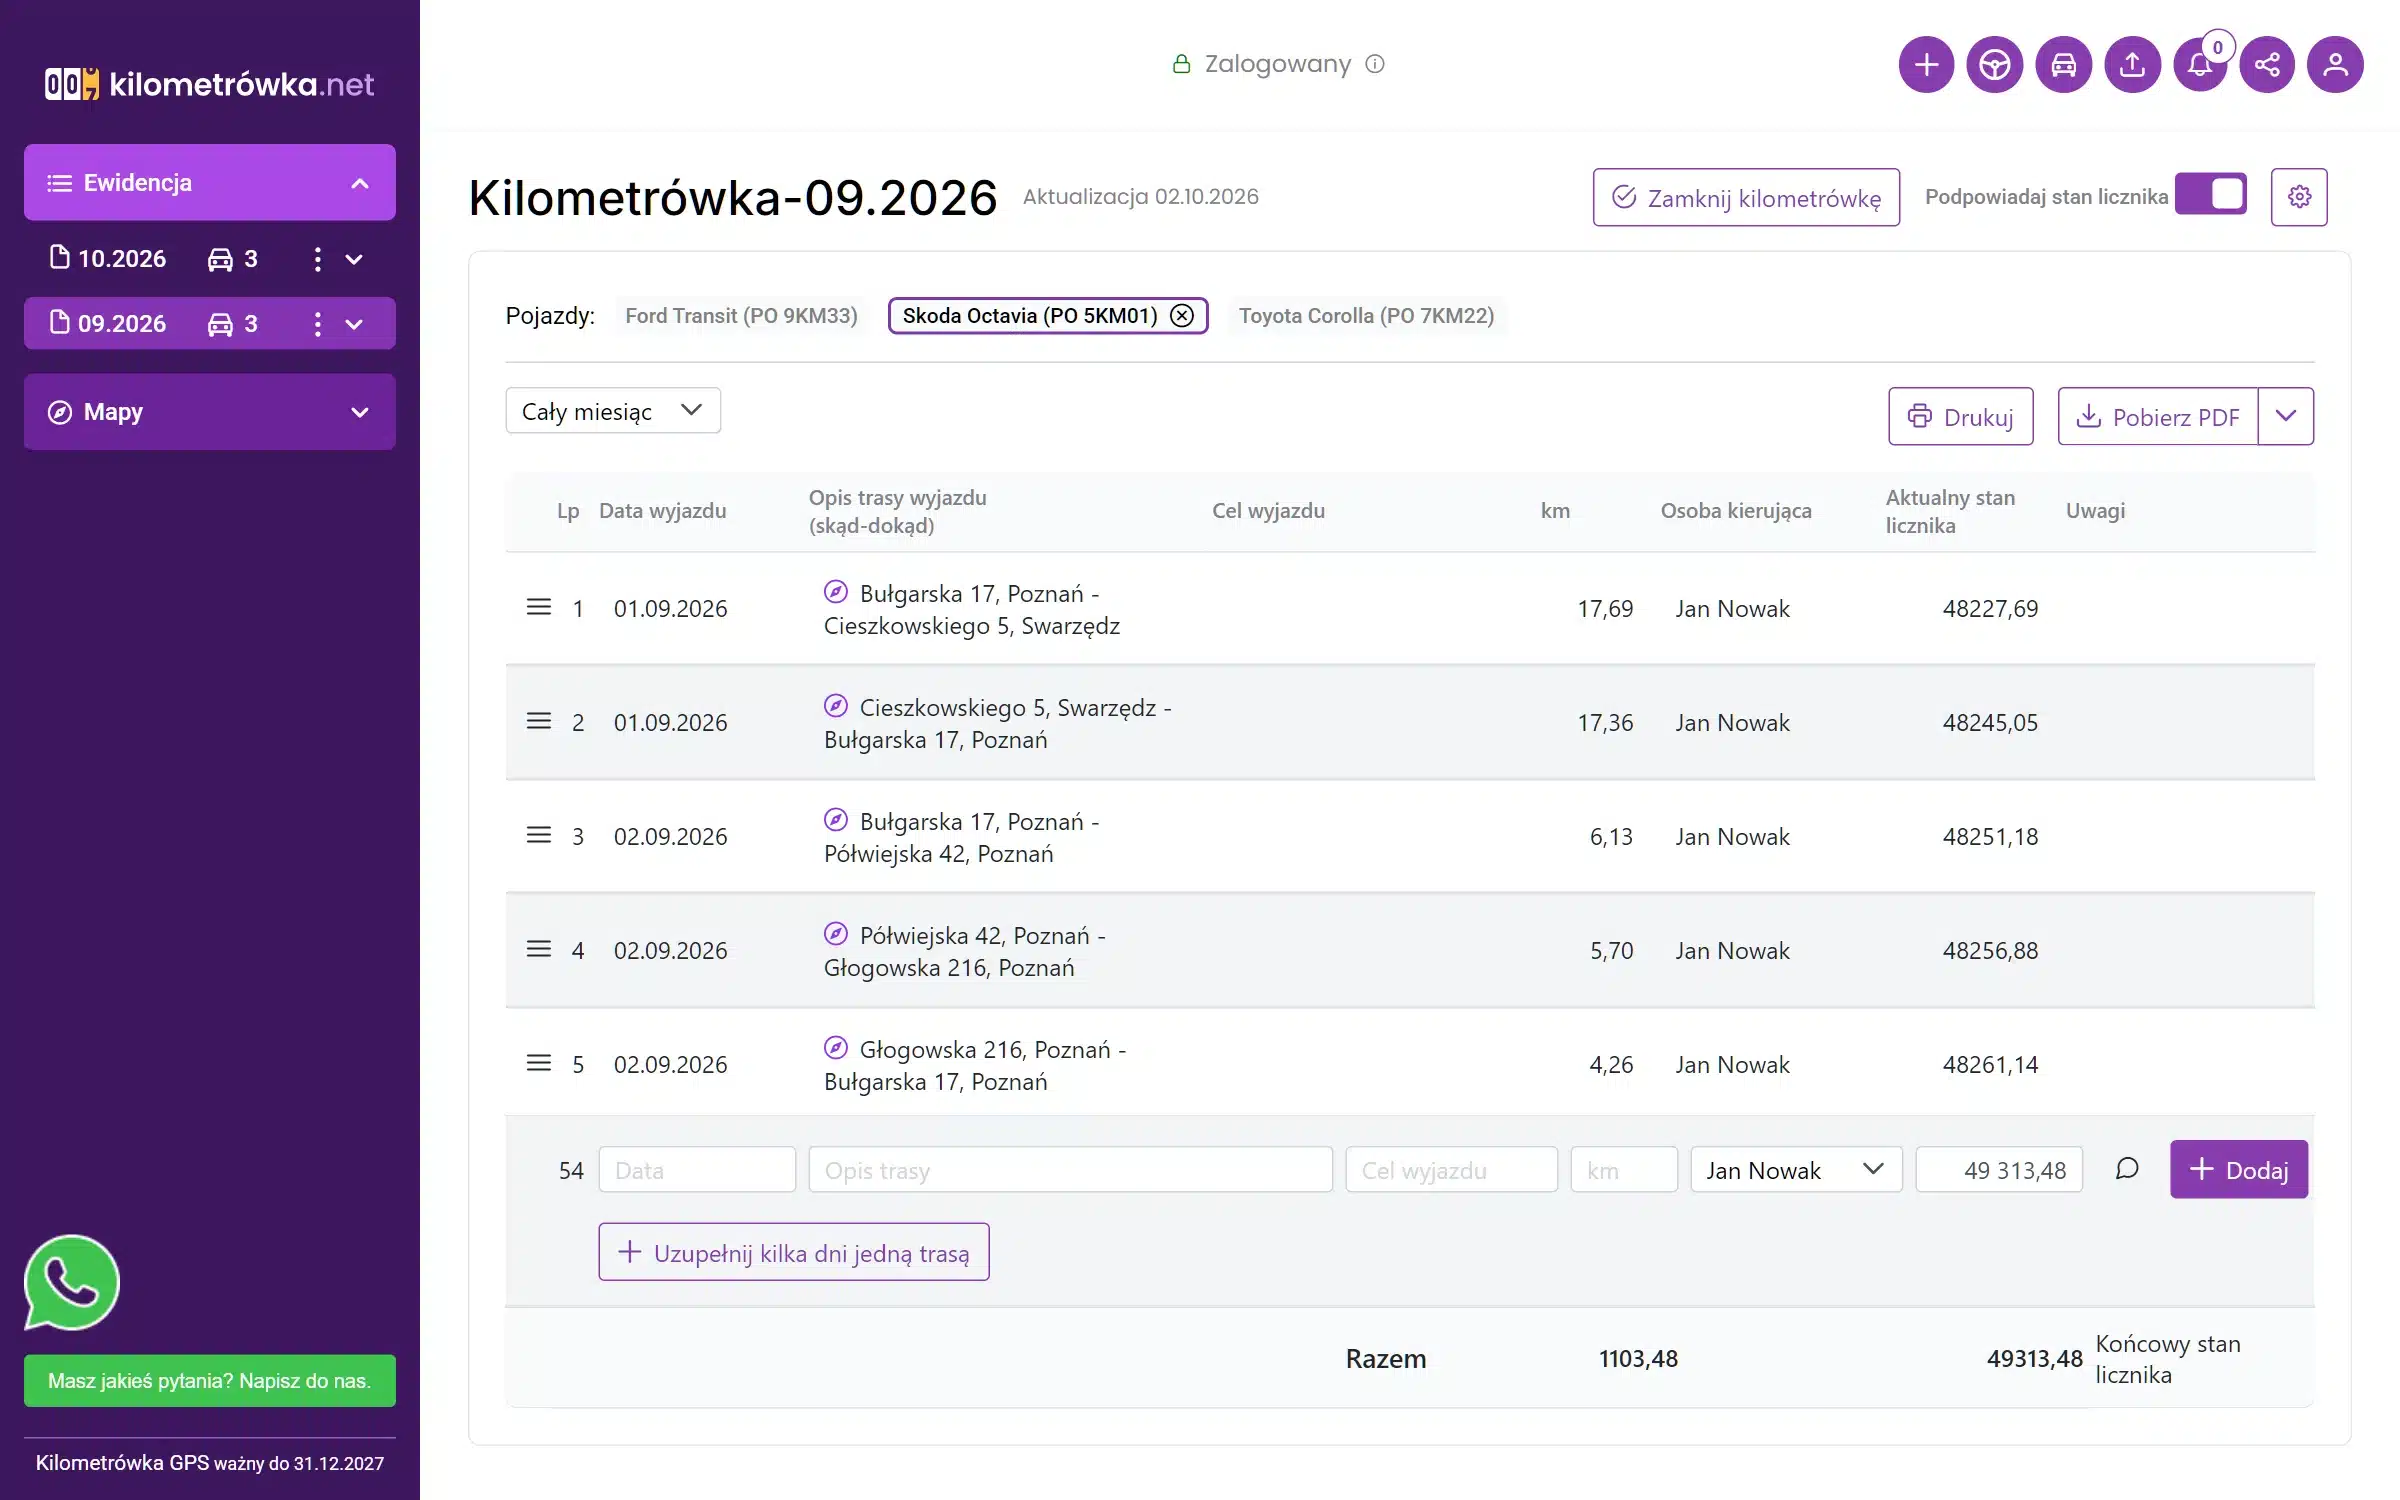
Each GPS entry is automatically populated with the following:
- date of departure,
- route description – the address from which the car departed and the address to which it arrived,
- number of kilometers as measured by the transmitter,
- counter – added to the previous entry,
- the person in charge – the driver assigned to the car.
You can recognize entries from the transmitter by the compass icon next to the route description. If a mileage log for the new month doesn't exist yet, the app will create one automatically when you record your first route.
Places – Name the places you go to
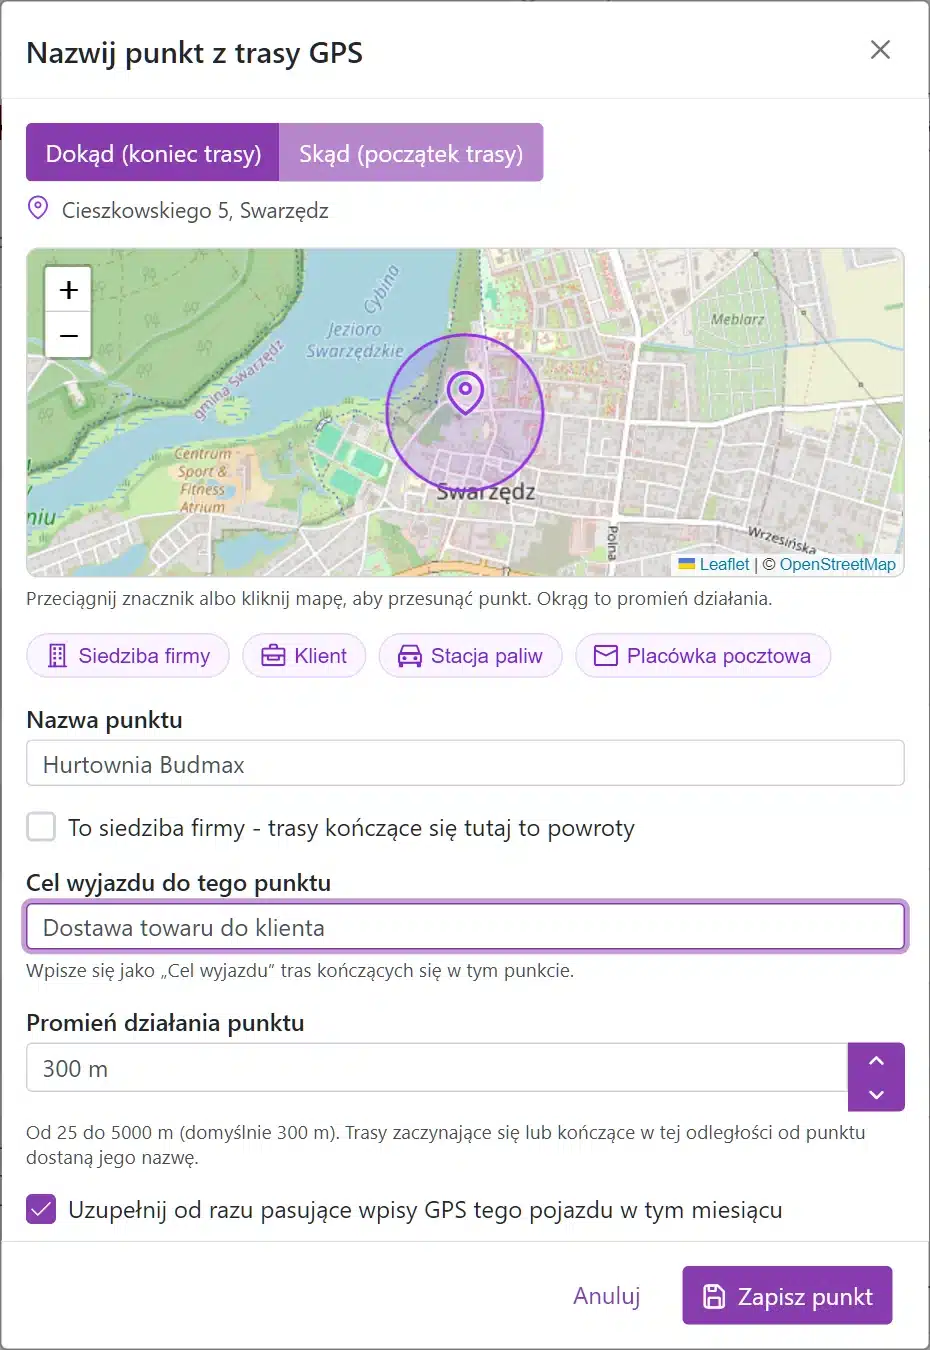
The address alone doesn't tell you much. A waypoint is a location with your name—for example, „Company Headquarters,” „Budmax Wholesale,” or „Gas Station”—and the destination of your trip, which should be entered into the mileage log.
The fastest way: straight from the logbook entry
- Click compass icon next to the GPS entry. On your phone, expand the entry and select Name the point.
- Choose which place you're referring to: Where to (end of the route) or Where (start of the route).
- Type item name i purpose of the trip, e.g., „Delivery of goods to a customer.” Predefined suggestions—Company Headquarters, Customer, Gas Station, Post Office—fill in the fields with a single click.
- Set range of operation. The default setting of 300 m is usually sufficient for a parking lot at a business; you can set it from 25 m to 5 km. You can also move the marker on the map.
- Click Save the point. Leave „Automatically update matching entries...” checked, and the entries for that car from the current month will be renamed immediately.
All locations in one place
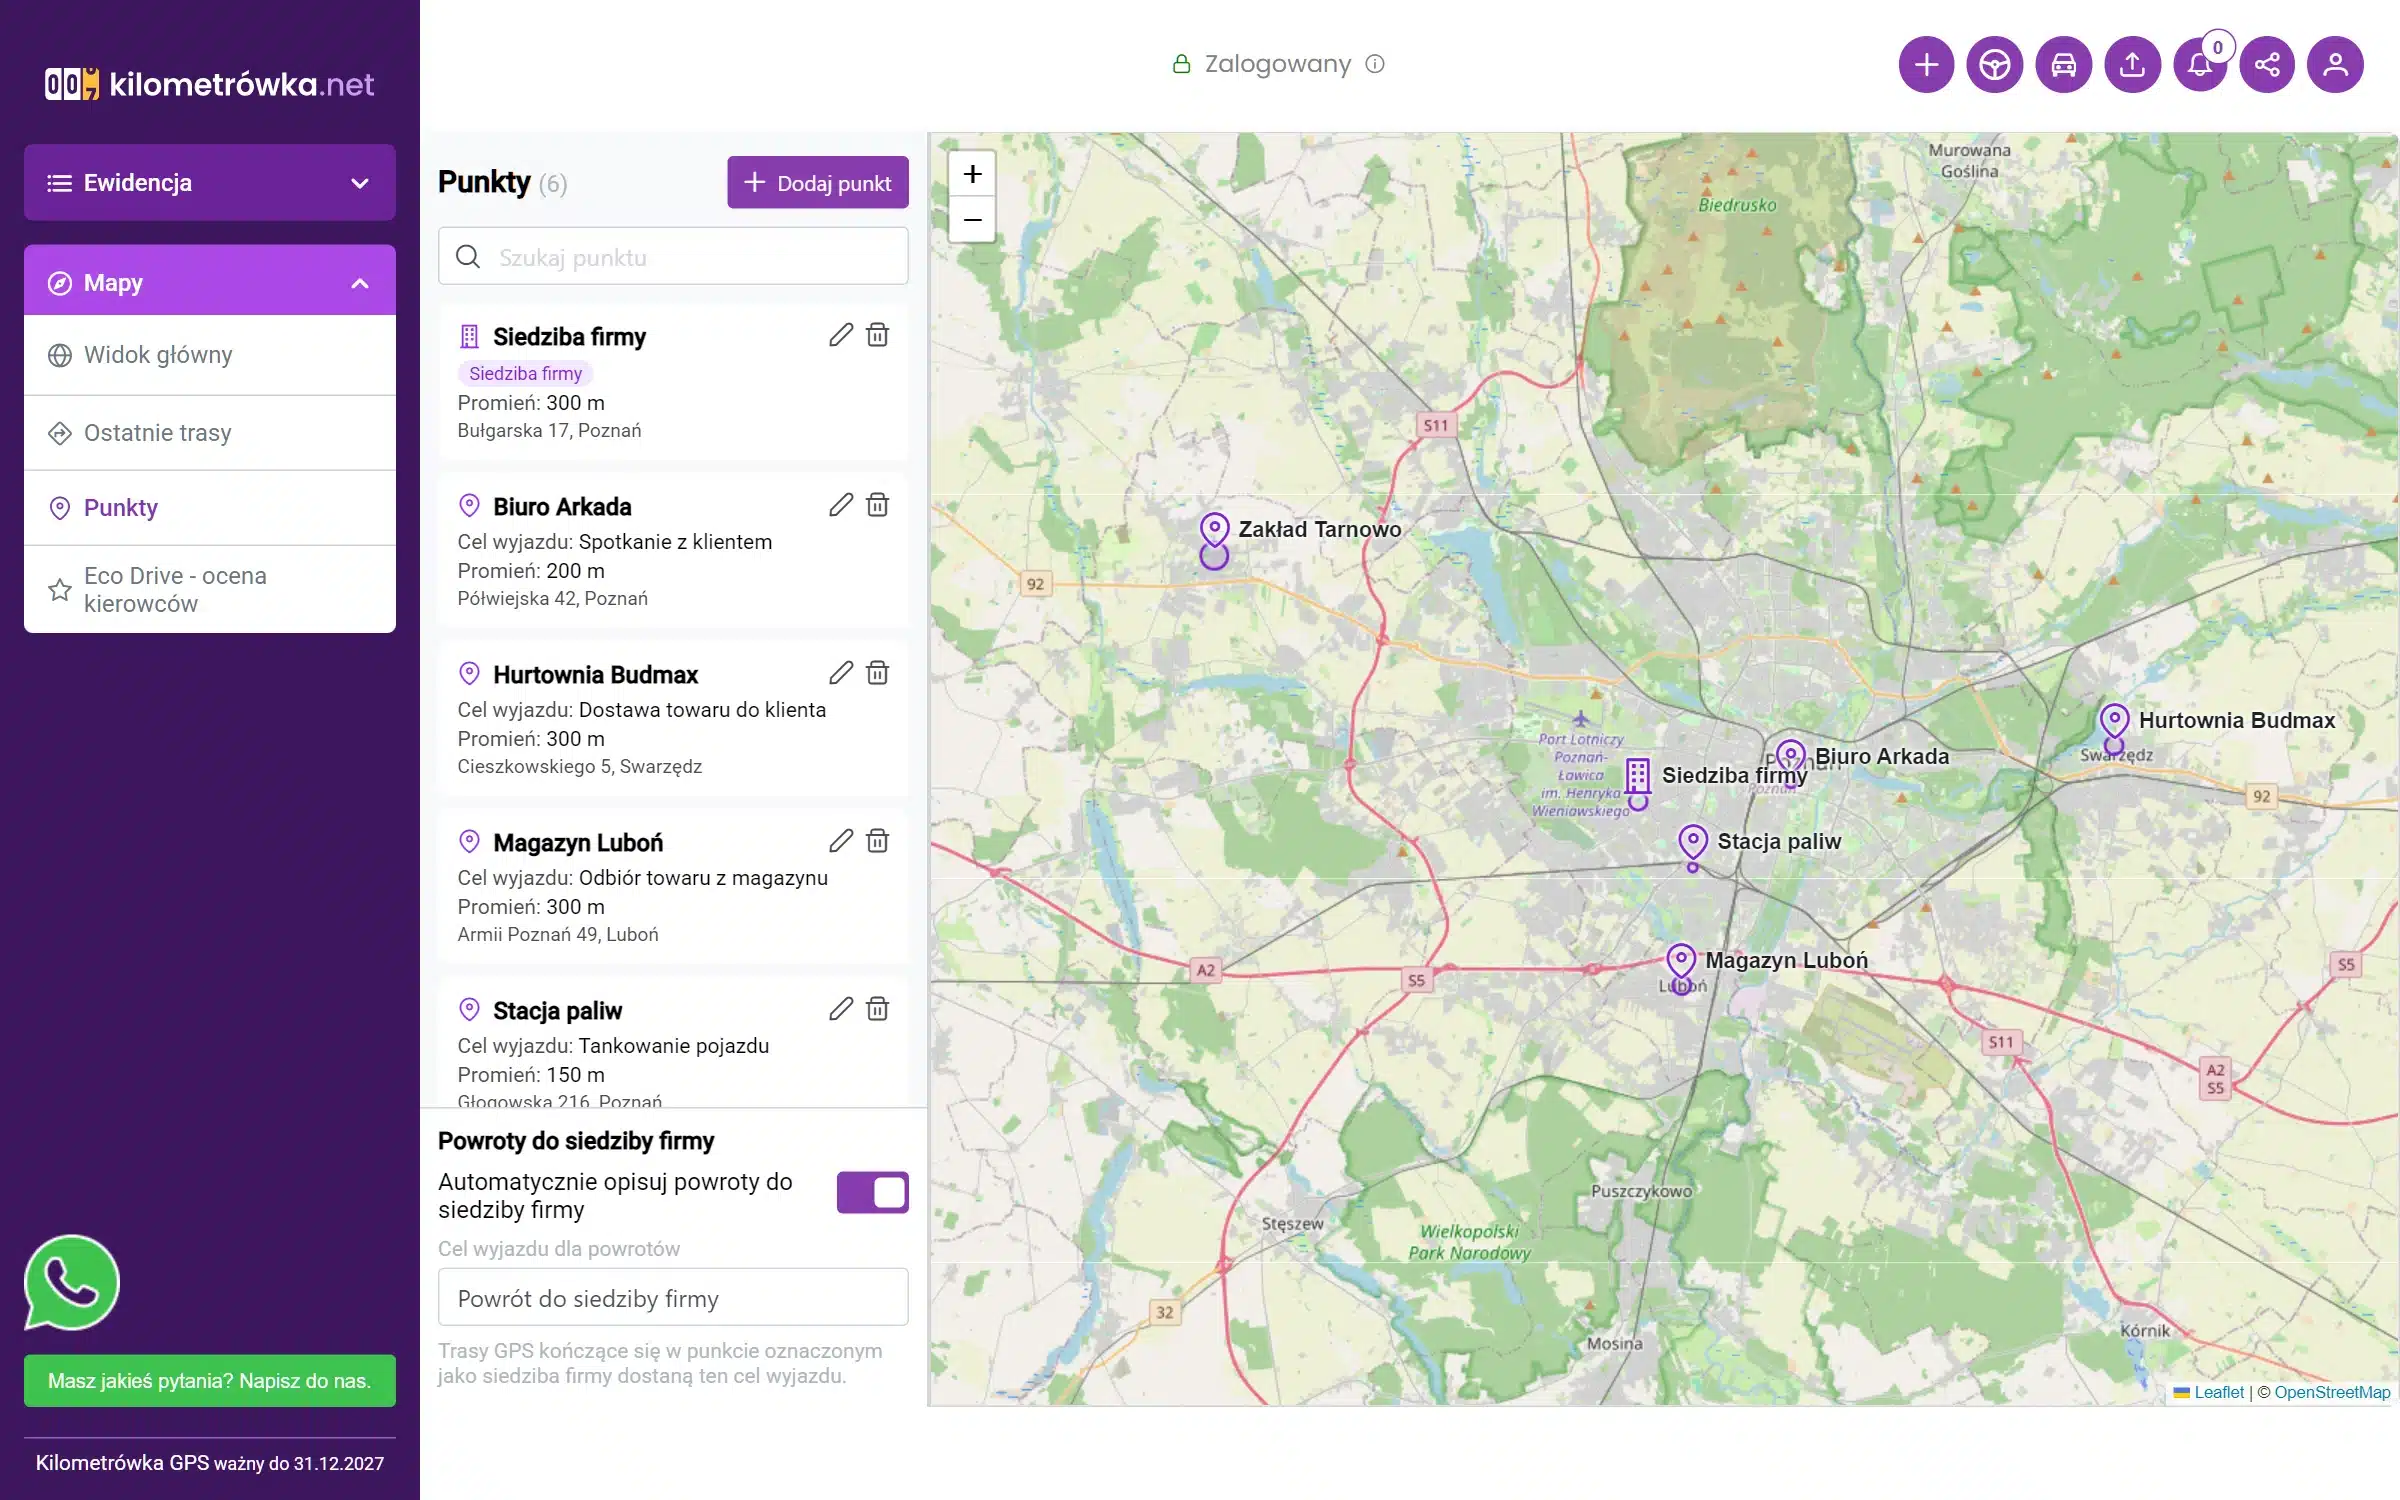
In the menu Maps → Points You'll see a list of the company's locations and their locations on the map. Here, you can also add a location where the car hasn't been yet: click Add a point and mark the location on the map. The waypoints are shared company-wide—they work for all vehicles.
Repeated routes speak for themselves
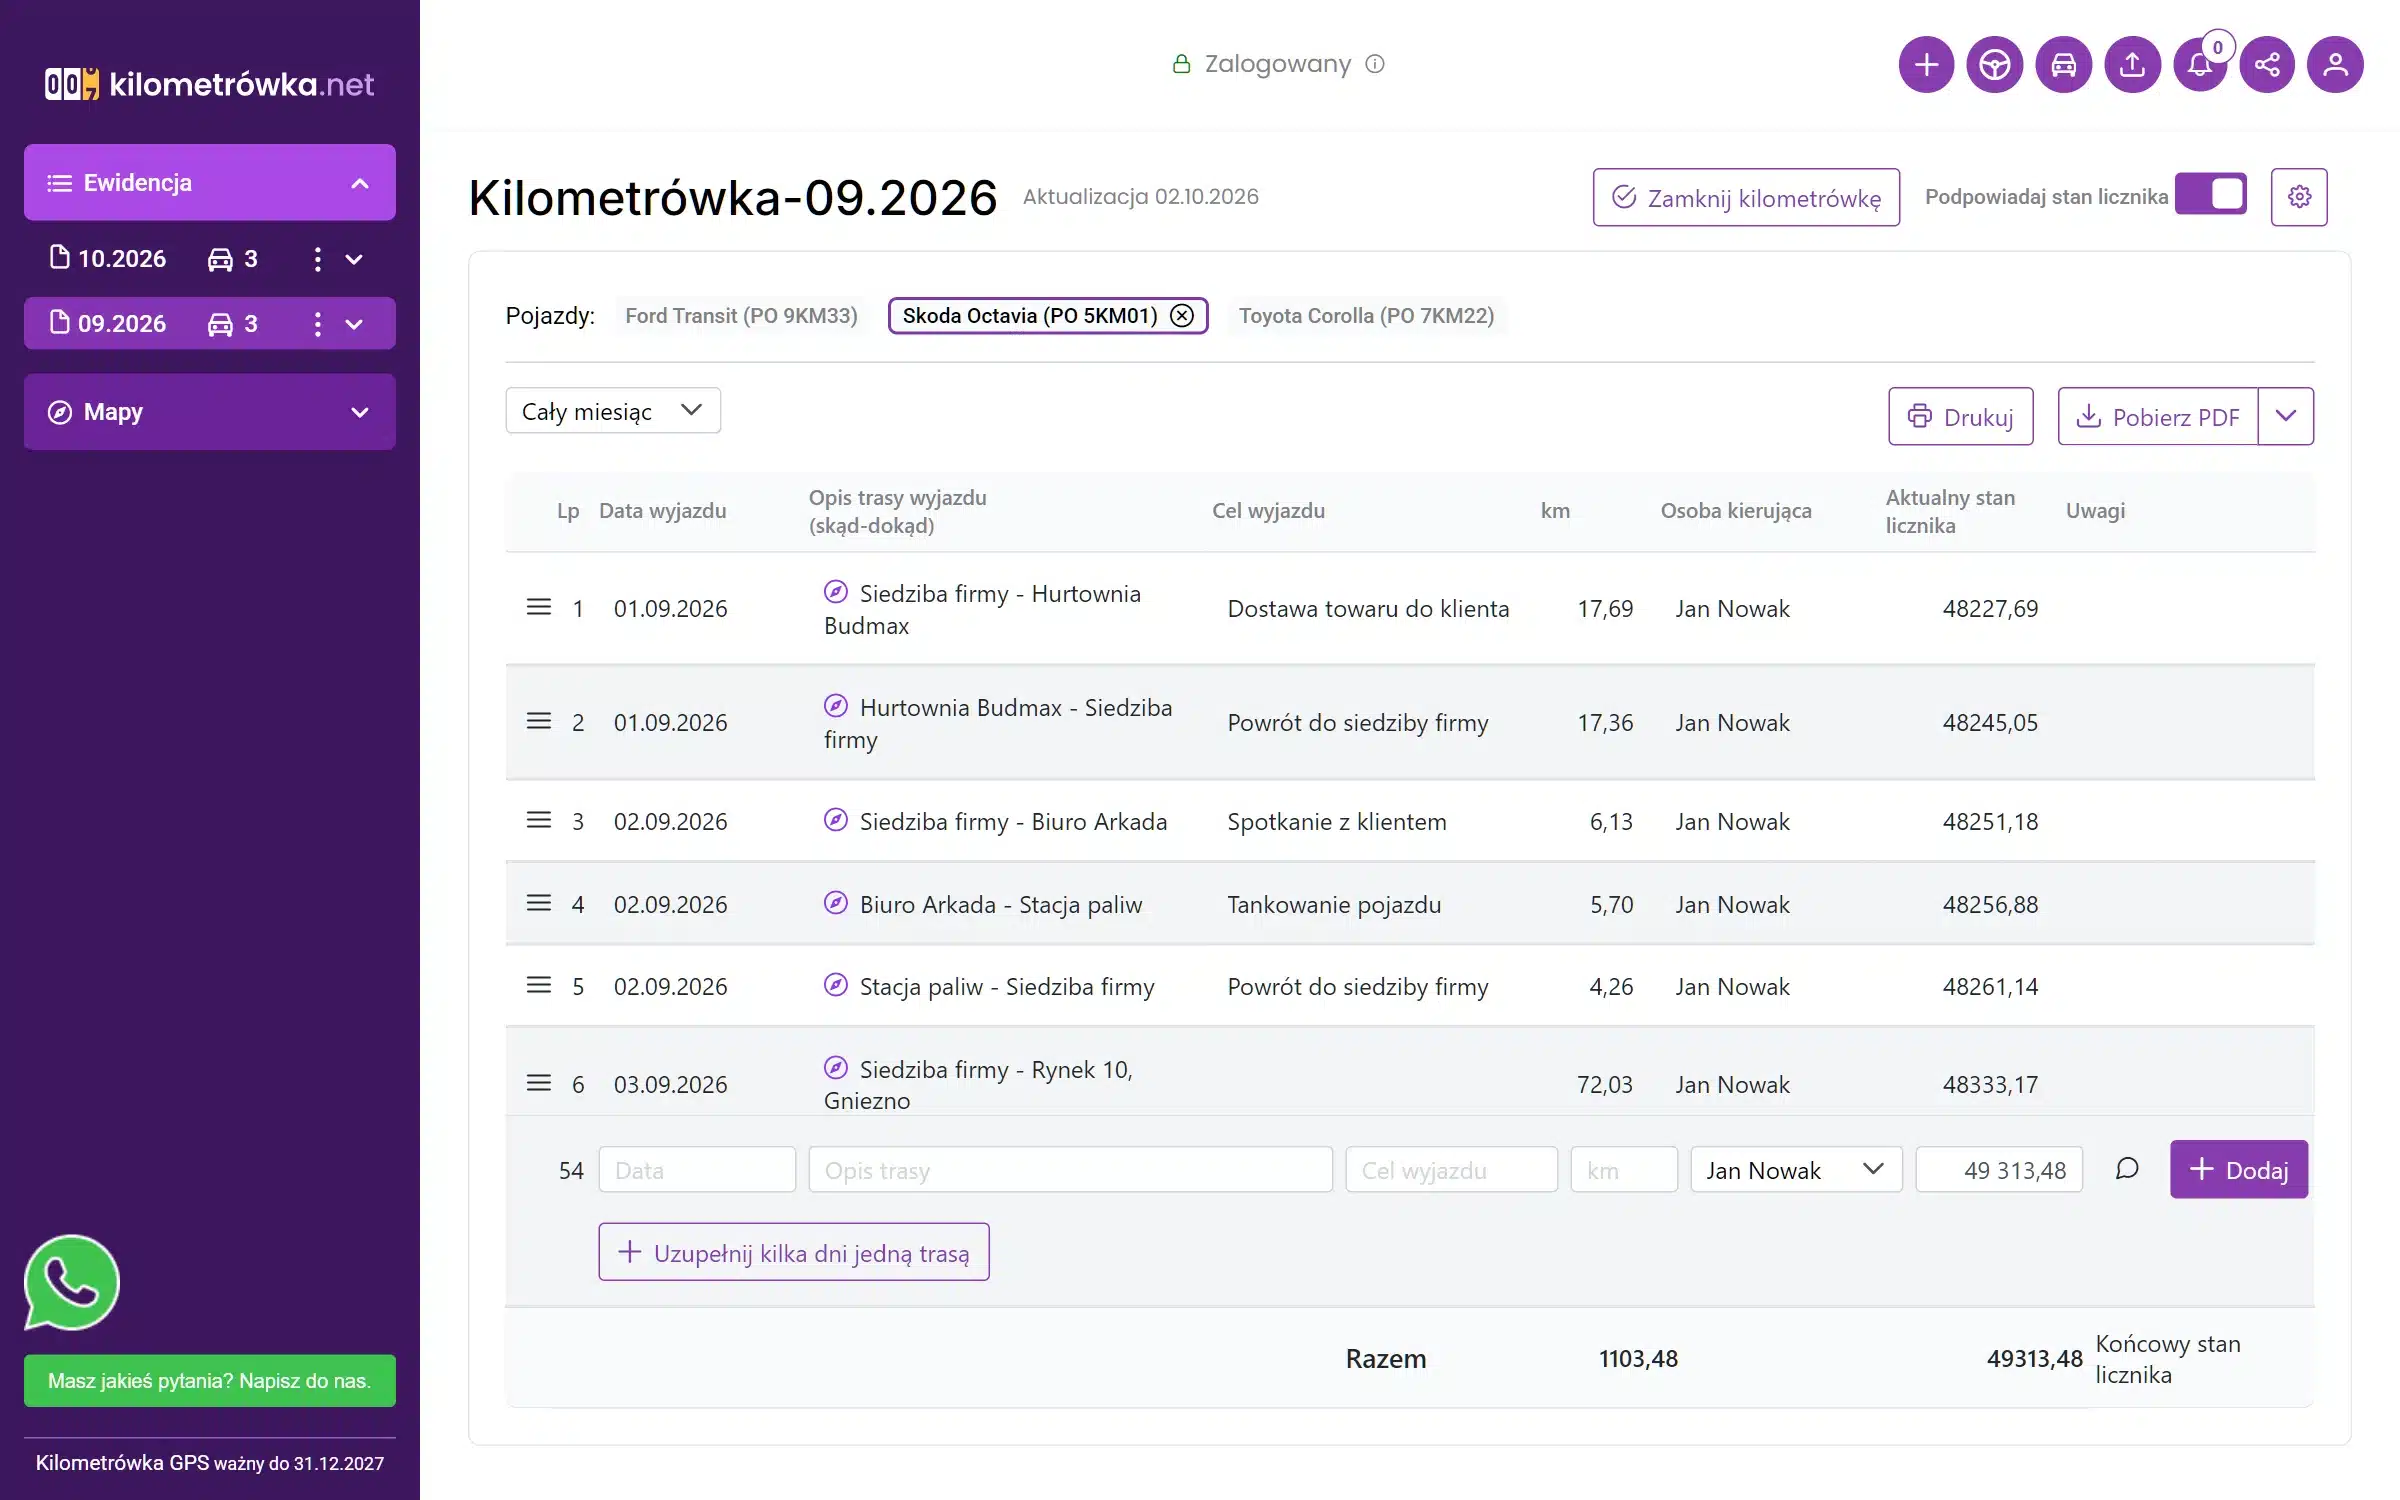
You only need to name a location once. From that point on, any route that starts or ends near it will be given that name—and the „Destination” field fills in automatically.
No points
With points
How it works:
- Name A waypoint replaces an address at the beginning or end of a route.
- Purpose of the trip starts from the point where the route ends – You're going to see a client, so the goal is, for example, „Meeting with a client.”.
- Returning to the Company: A route that ends at a location marked as the company headquarters is assigned the destination „Return to company headquarters.” You can change the text or disable this option in Maps → Points, in the section titled „Returning to the Company’s Headquarters.”.
- Places you haven't named are described by their address—you can fill them in manually or add another item.
Combining Routes into a Single Entry
The transmitter records a separate route after each stop. If you refueled or made a quick stop along the way, it’s more convenient to have just one entry for that in the mileage log. That’s what merging is for.
Method 1: Two adjacent entries
Hover your mouse between two entries—a button will appear Merge the selected items, and both entries will be highlighted. One click merges them into a single entry.
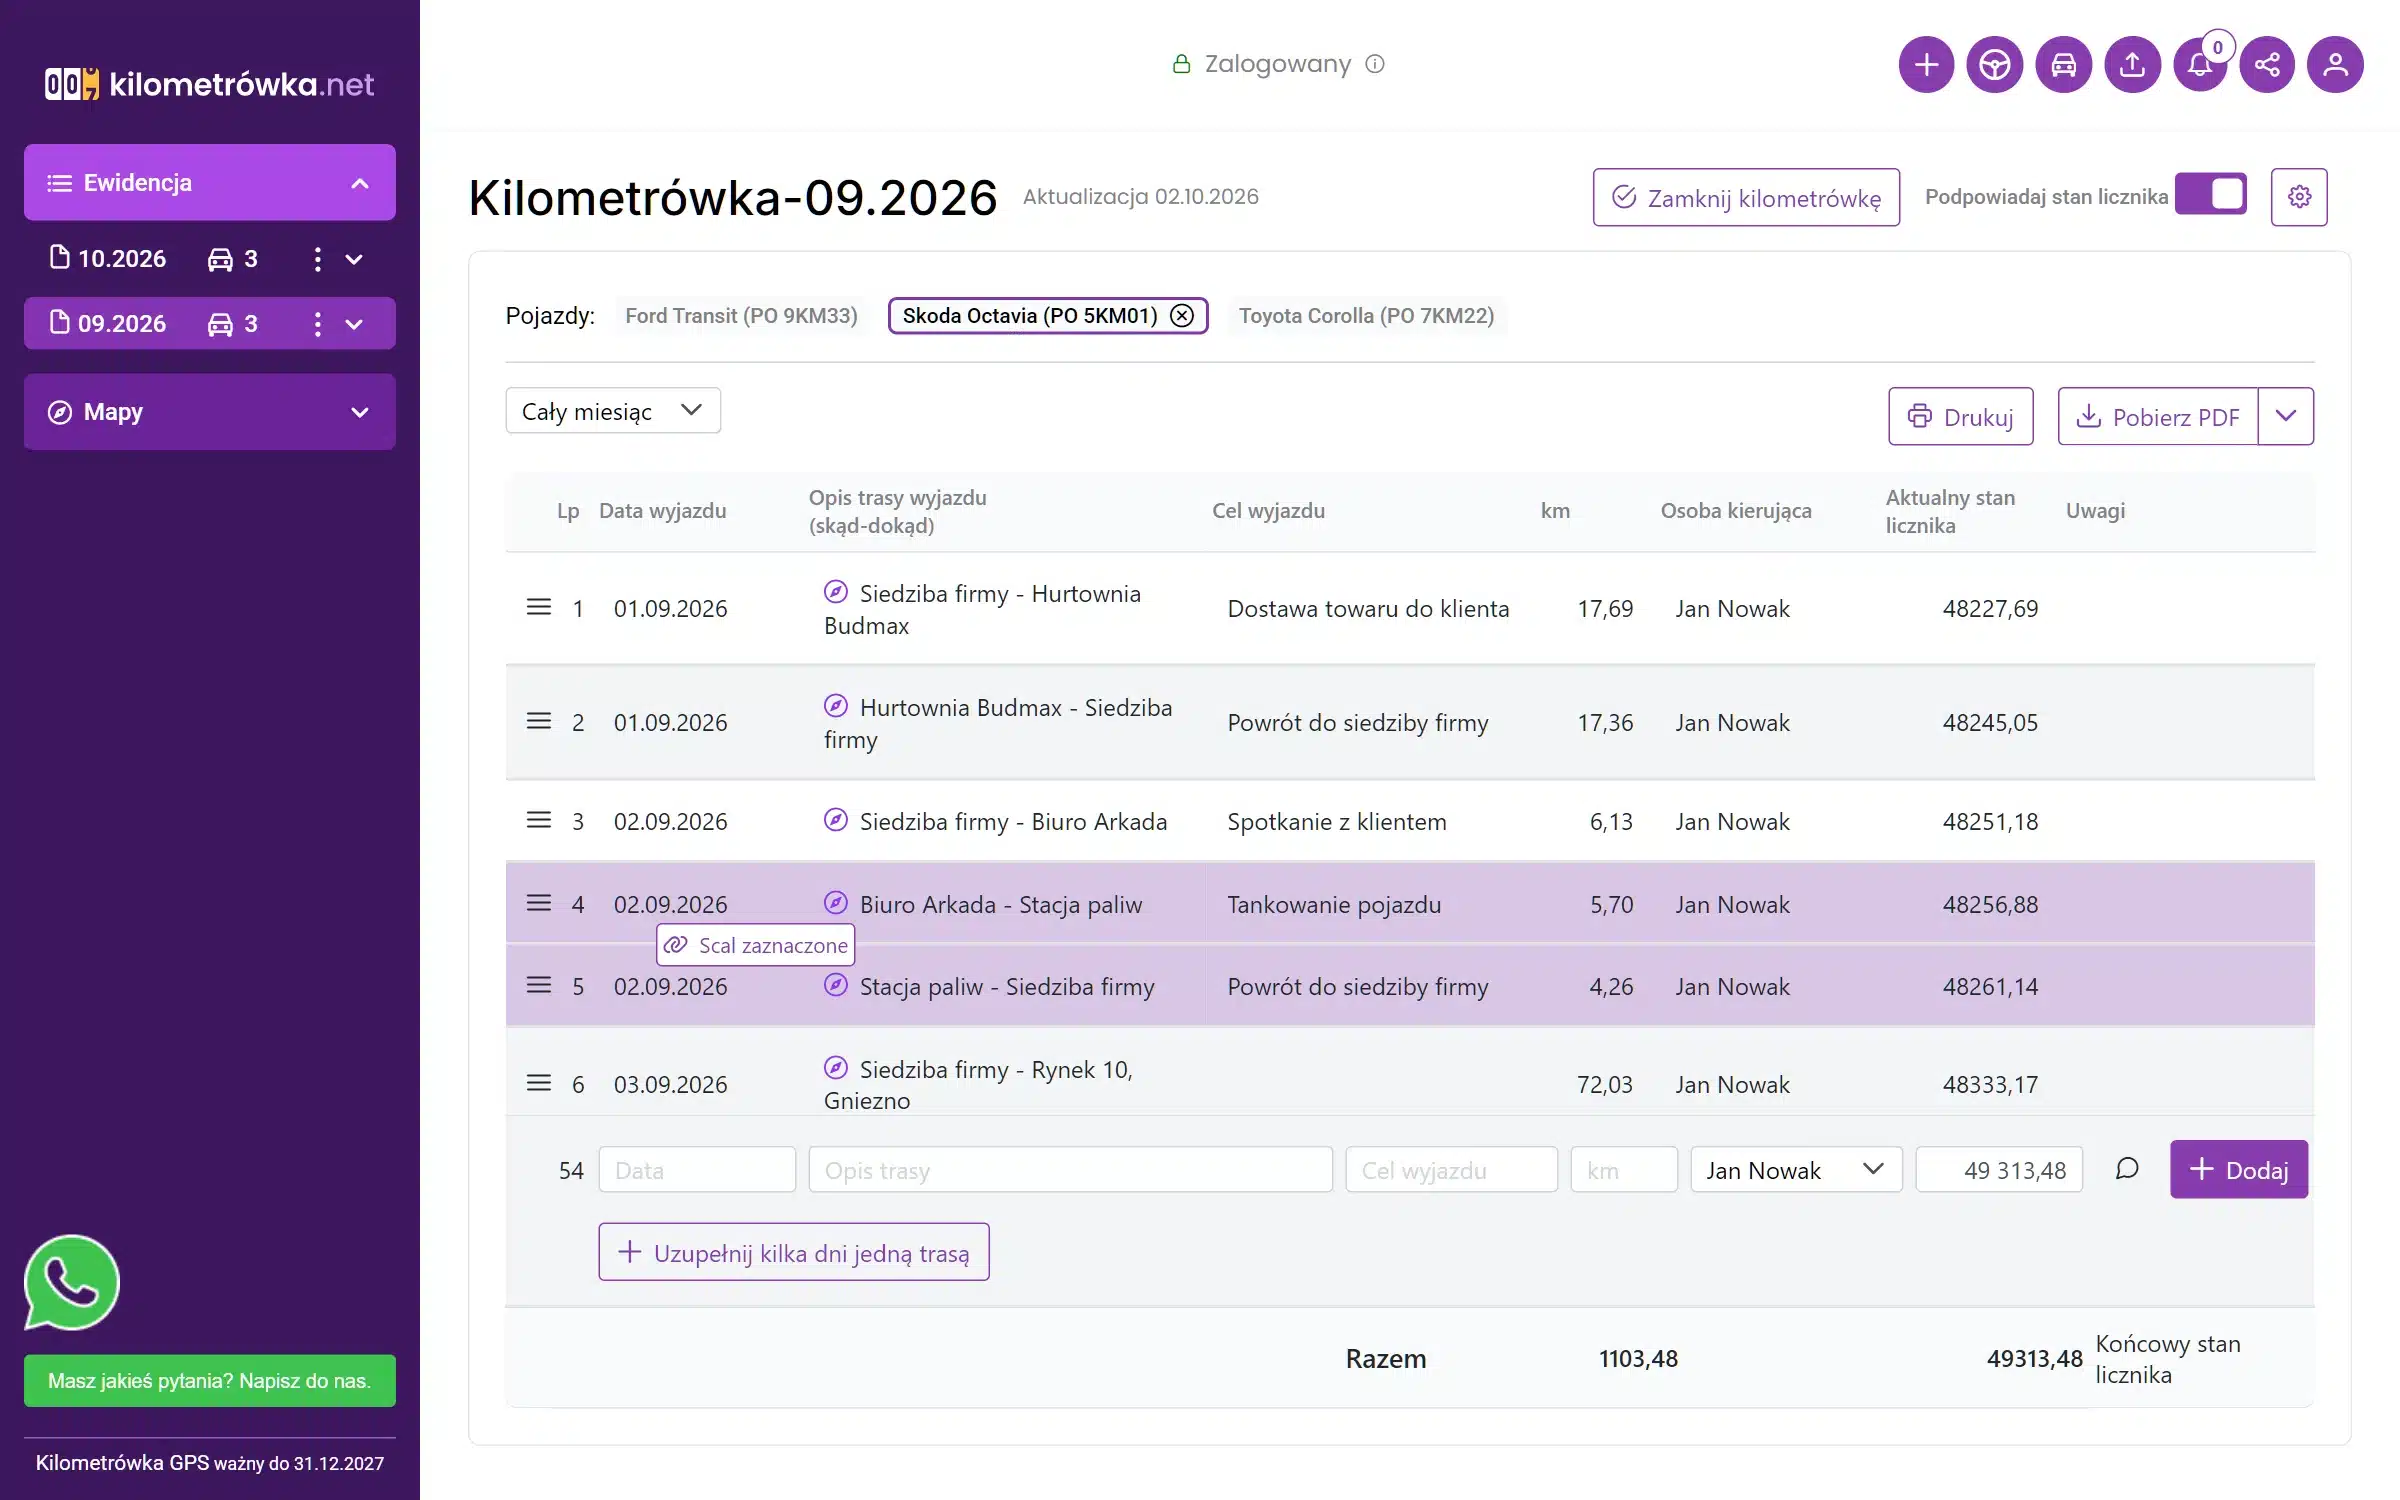
Method 2: Multiple Entries at Once
- Click any entry—checkboxes will appear next to the entries.
- Select the entries to merge. Using the key Shift Select the entire range from–to.
- Click Merge the selected items above the table.
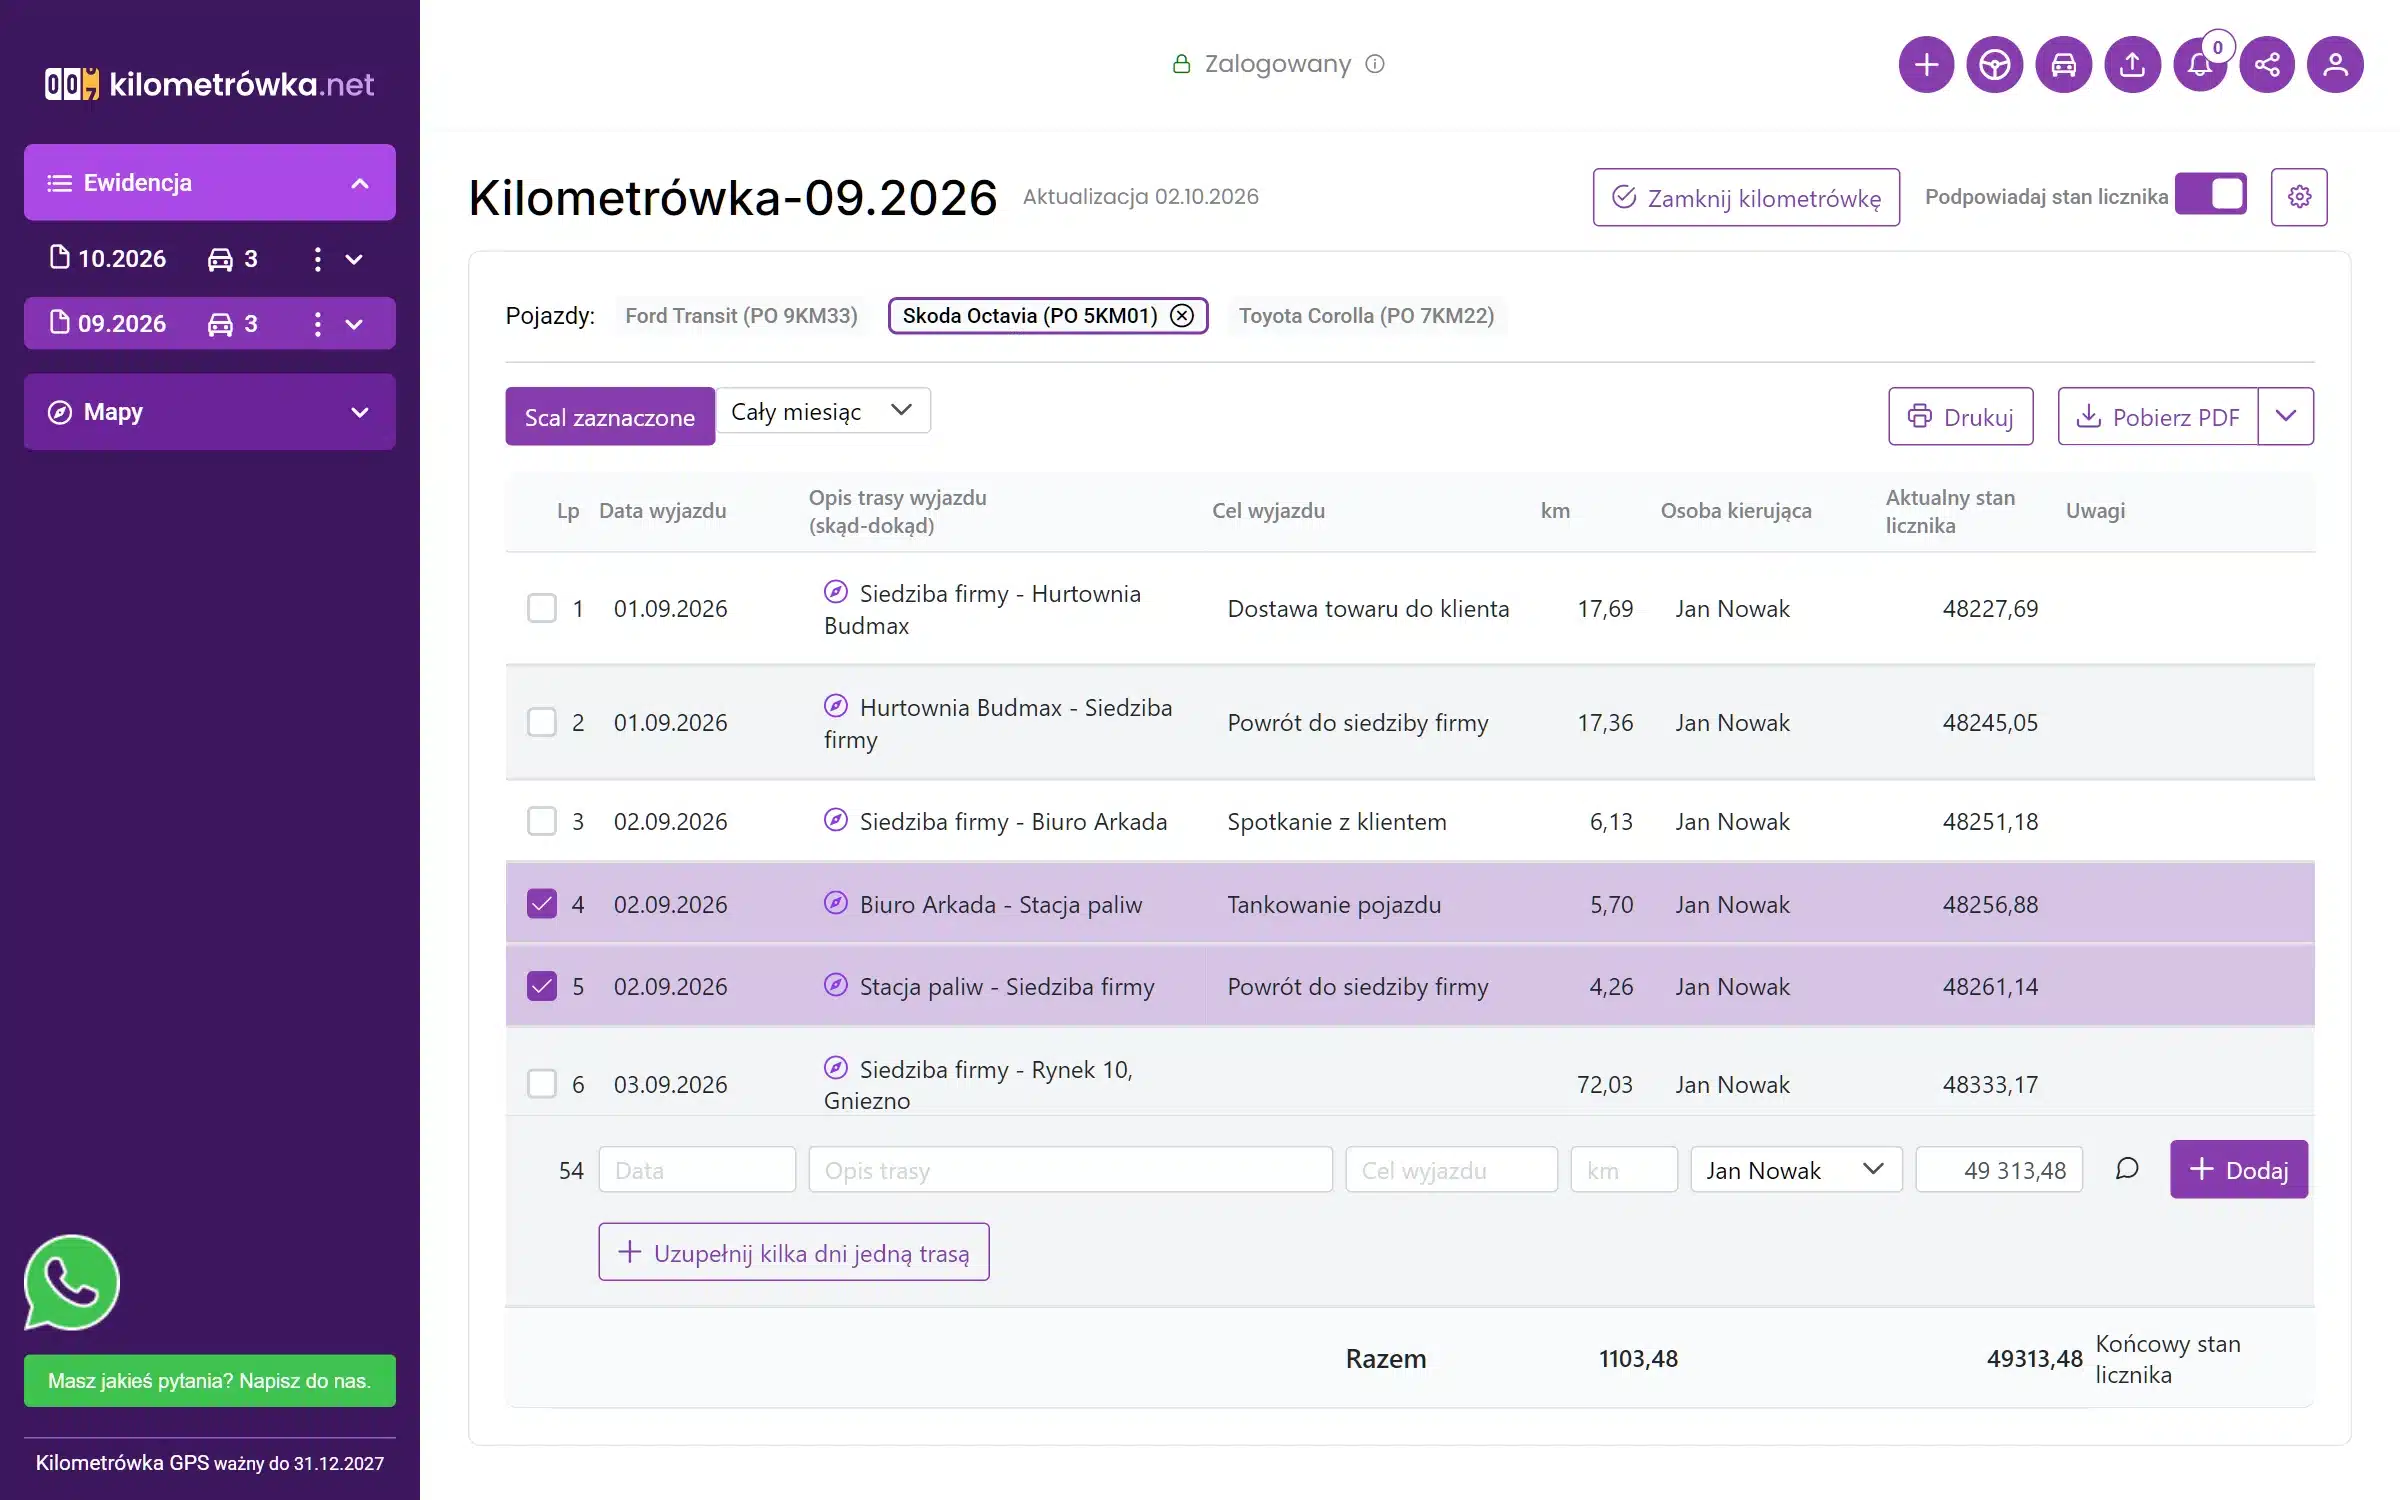
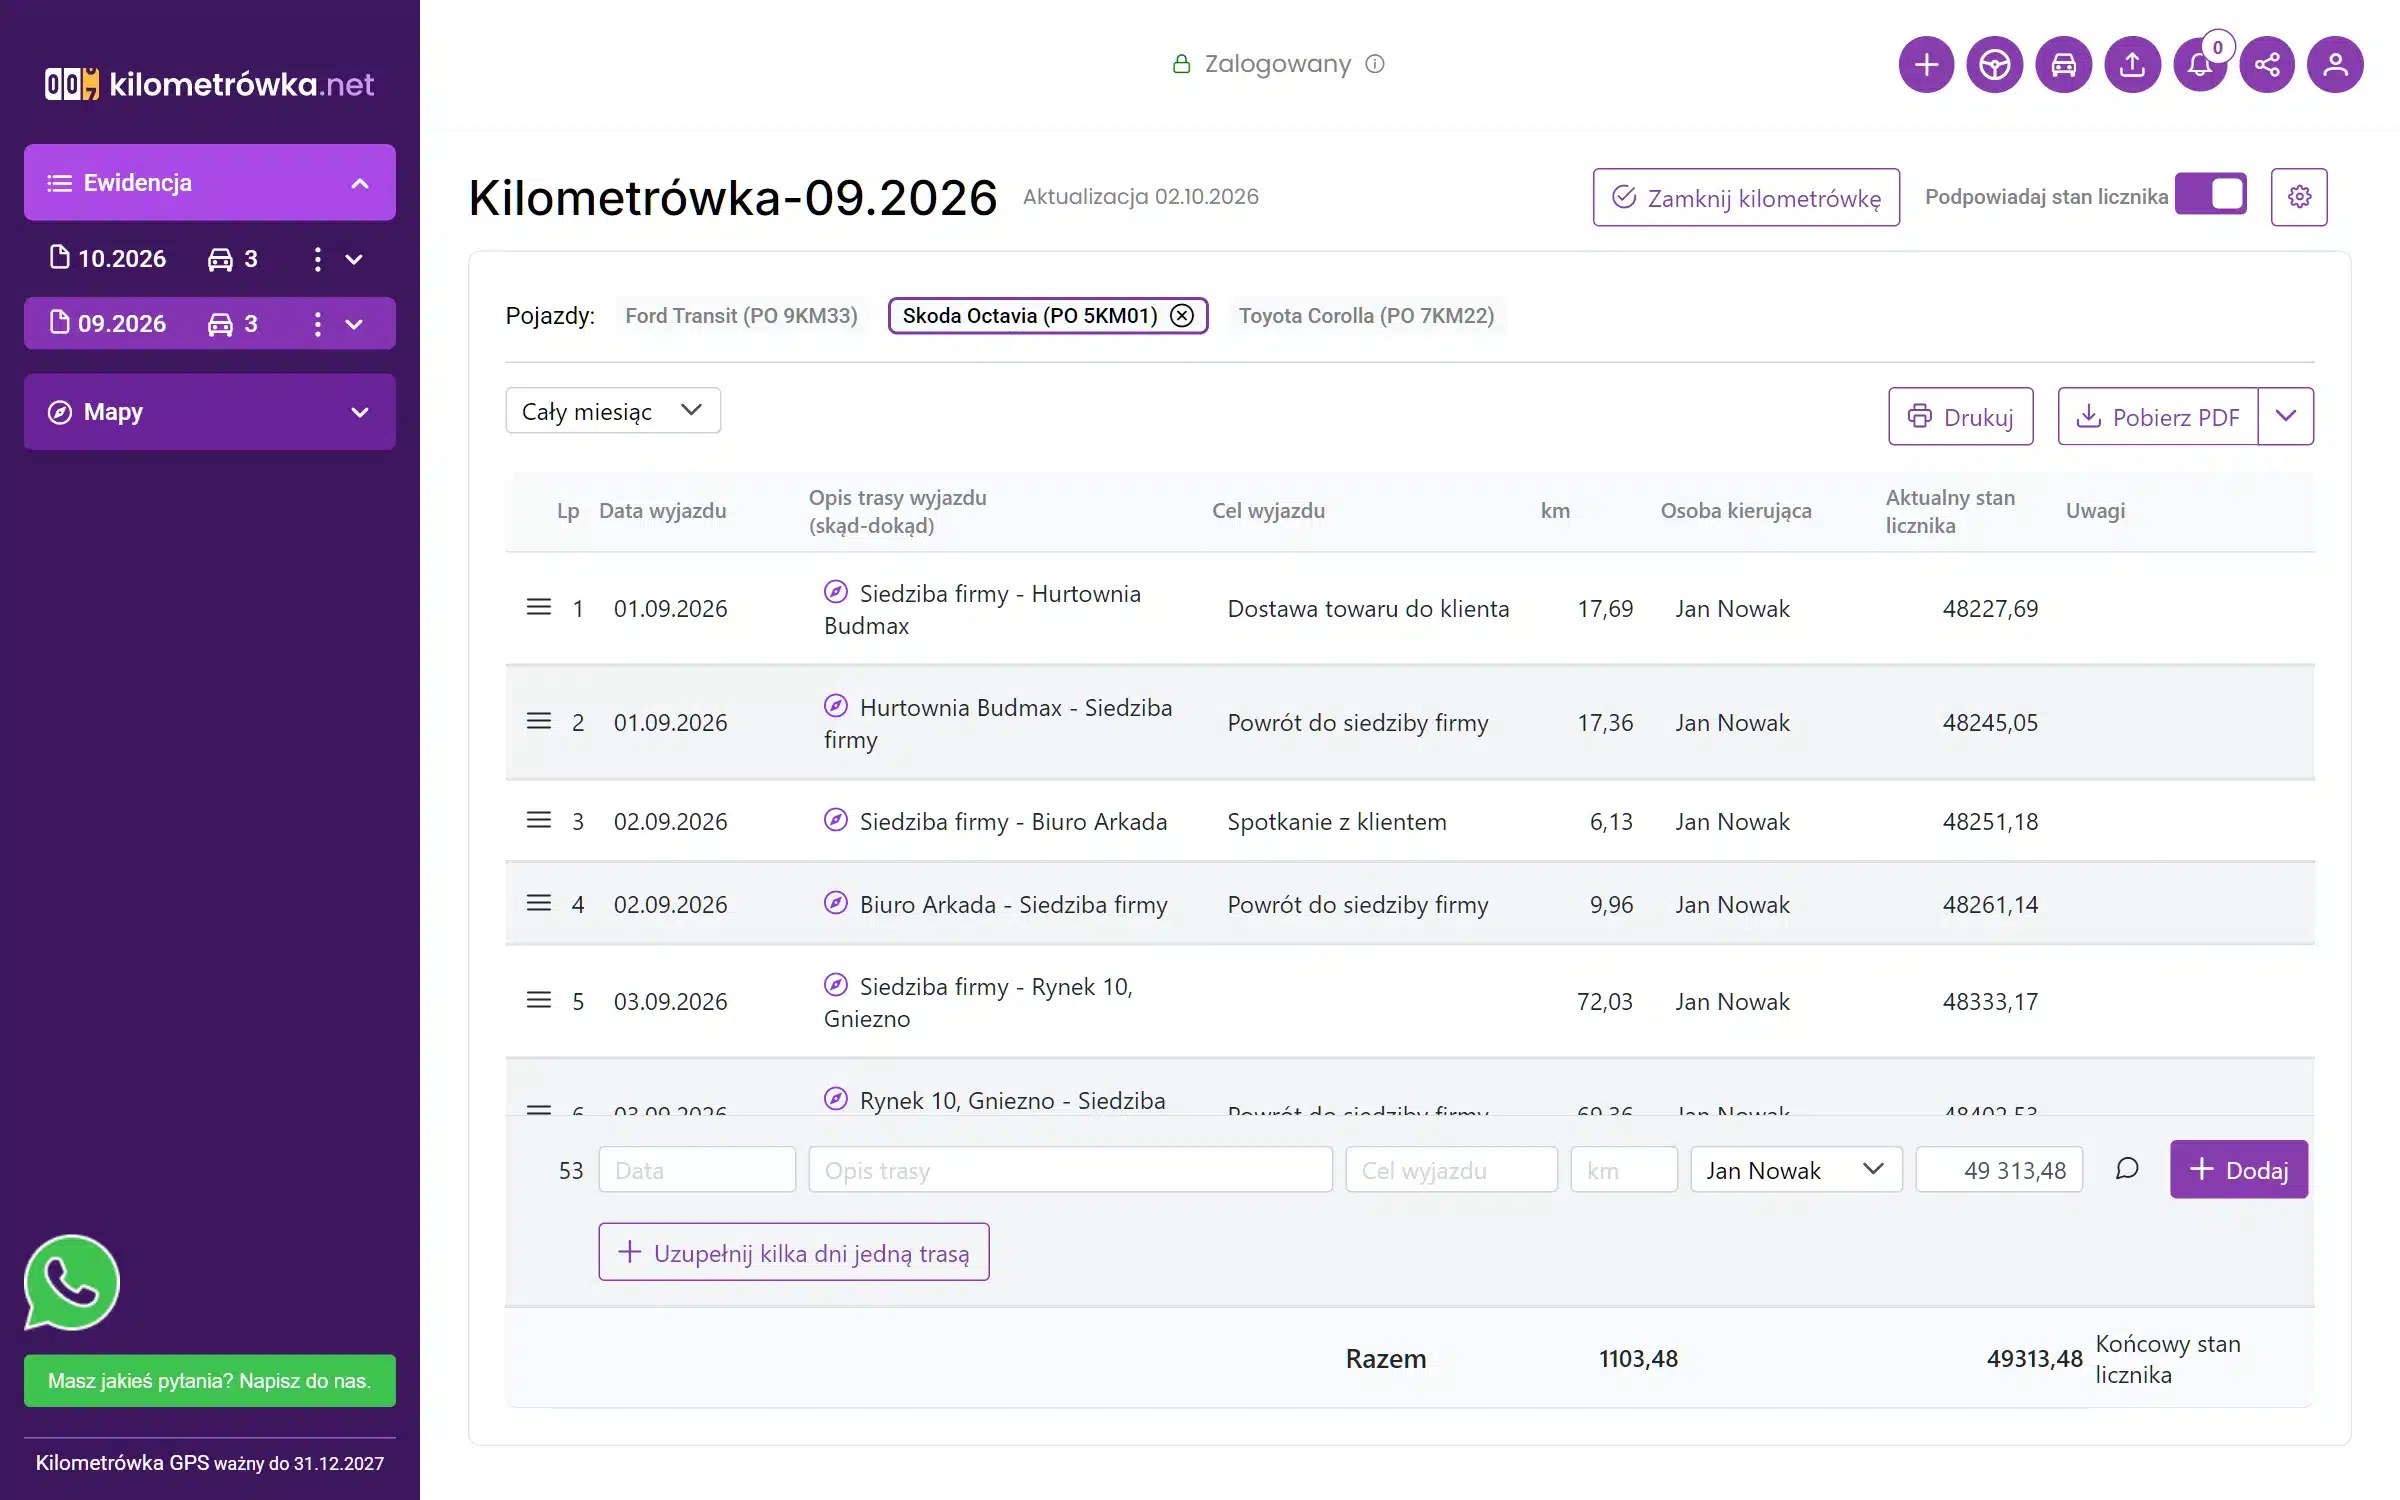
What is created after the merge:
- route description: start of the first post – end of the last one,
- kilometers: the sum of the merged entries; the counter value remains unchanged at the end,
- date, purpose of the trip, and driver: from the last of the entries being merged.
Map: Where the cars are and which routes they took
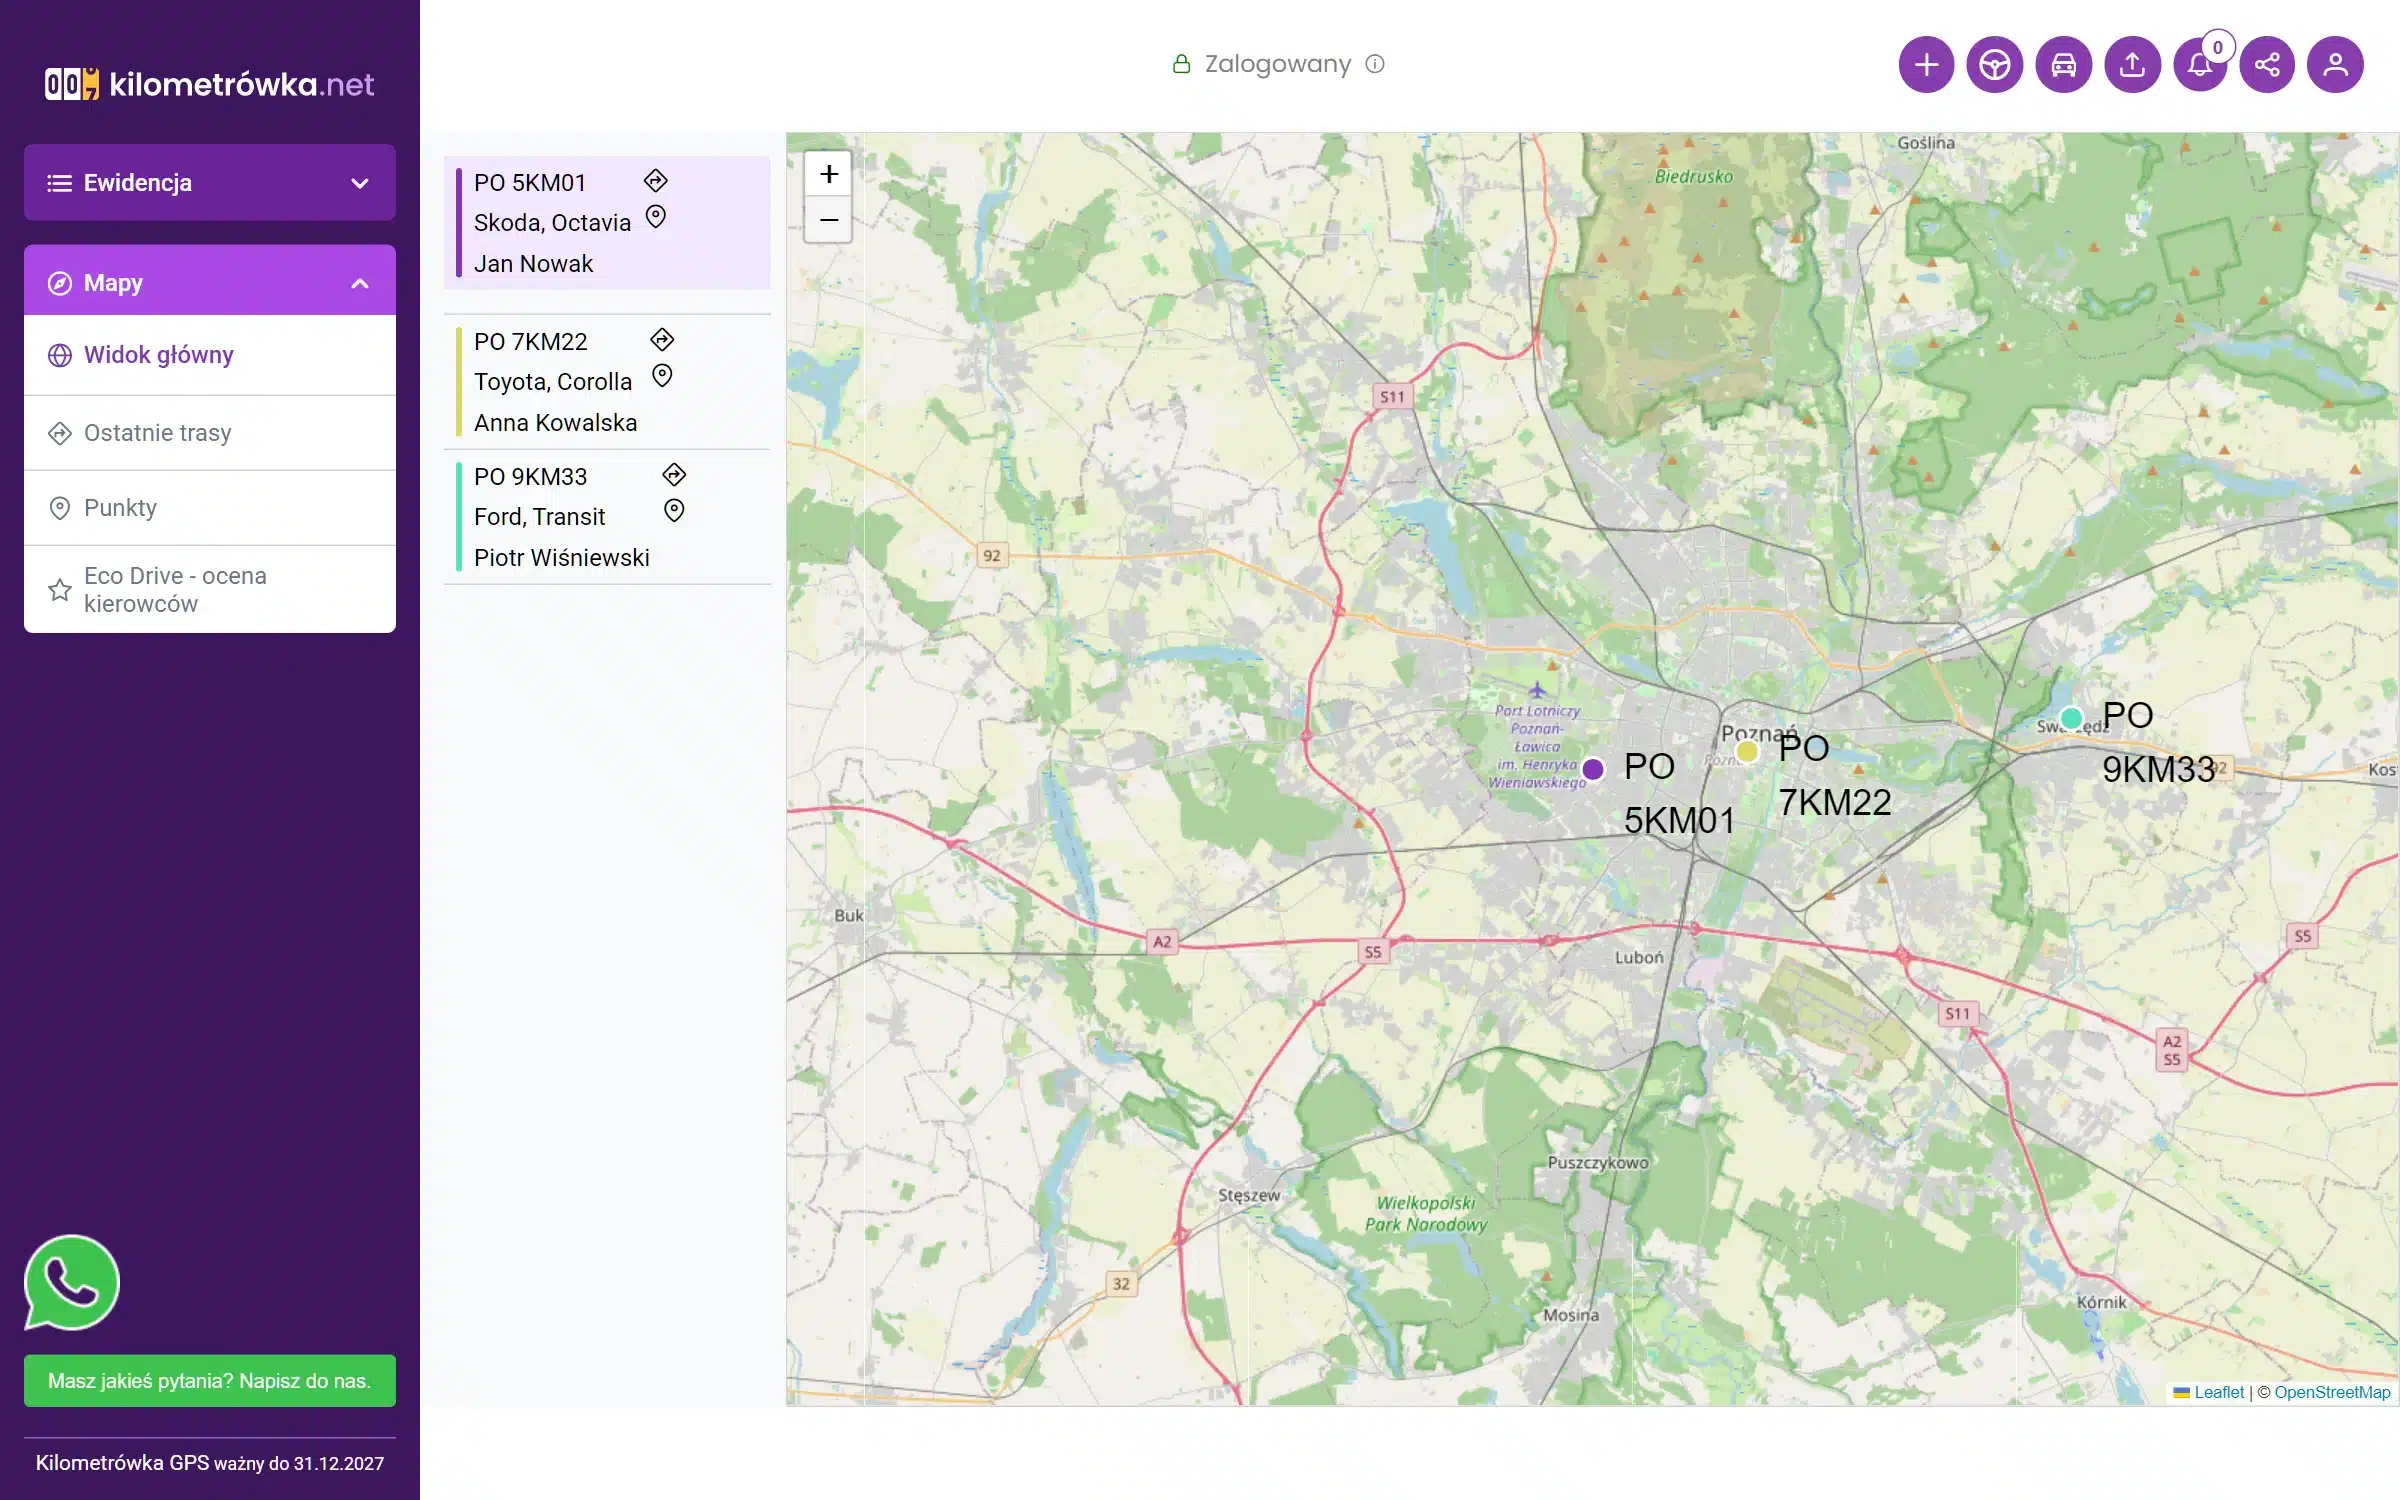
In the menu Maps You'll see the same thing as in the odometer, only on the map: the current location of the cars and the exact course of each route.
Main View – Where the Cars Are Now
All vehicles with transmitters on a single map, along with their license plate numbers and drivers. Click a vehicle in the list to zoom in on it on the map. The pin icon next to the vehicle shows when the transmitter last reported its location.
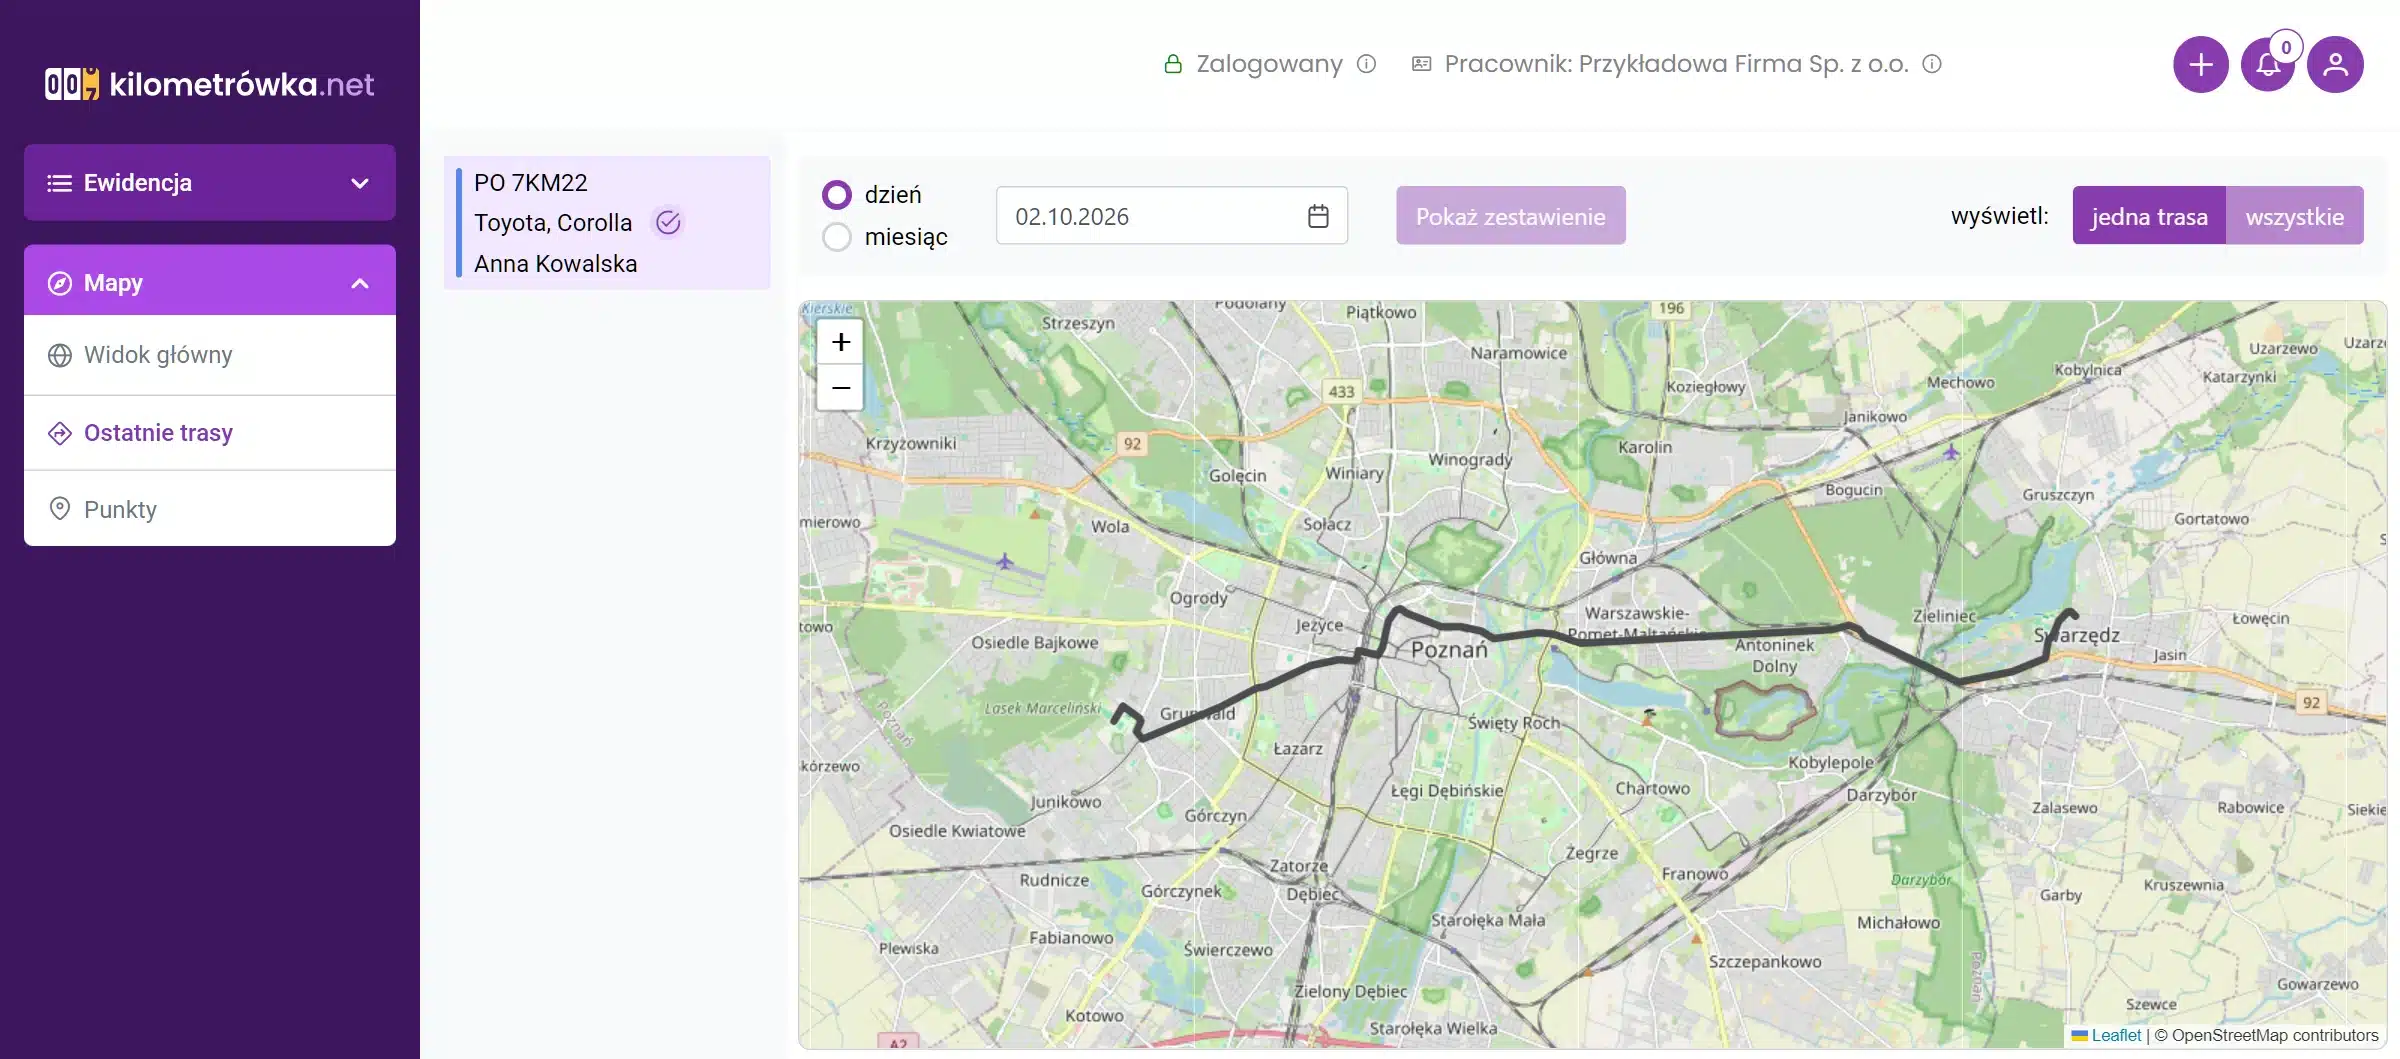
Recent Routes – Which Way the Car Went
- Select a car from the list on the left.
- Select day or the whole thing month.
- Switch view: one route shows the trip selected from the list, all – all routes from the selected period at once.
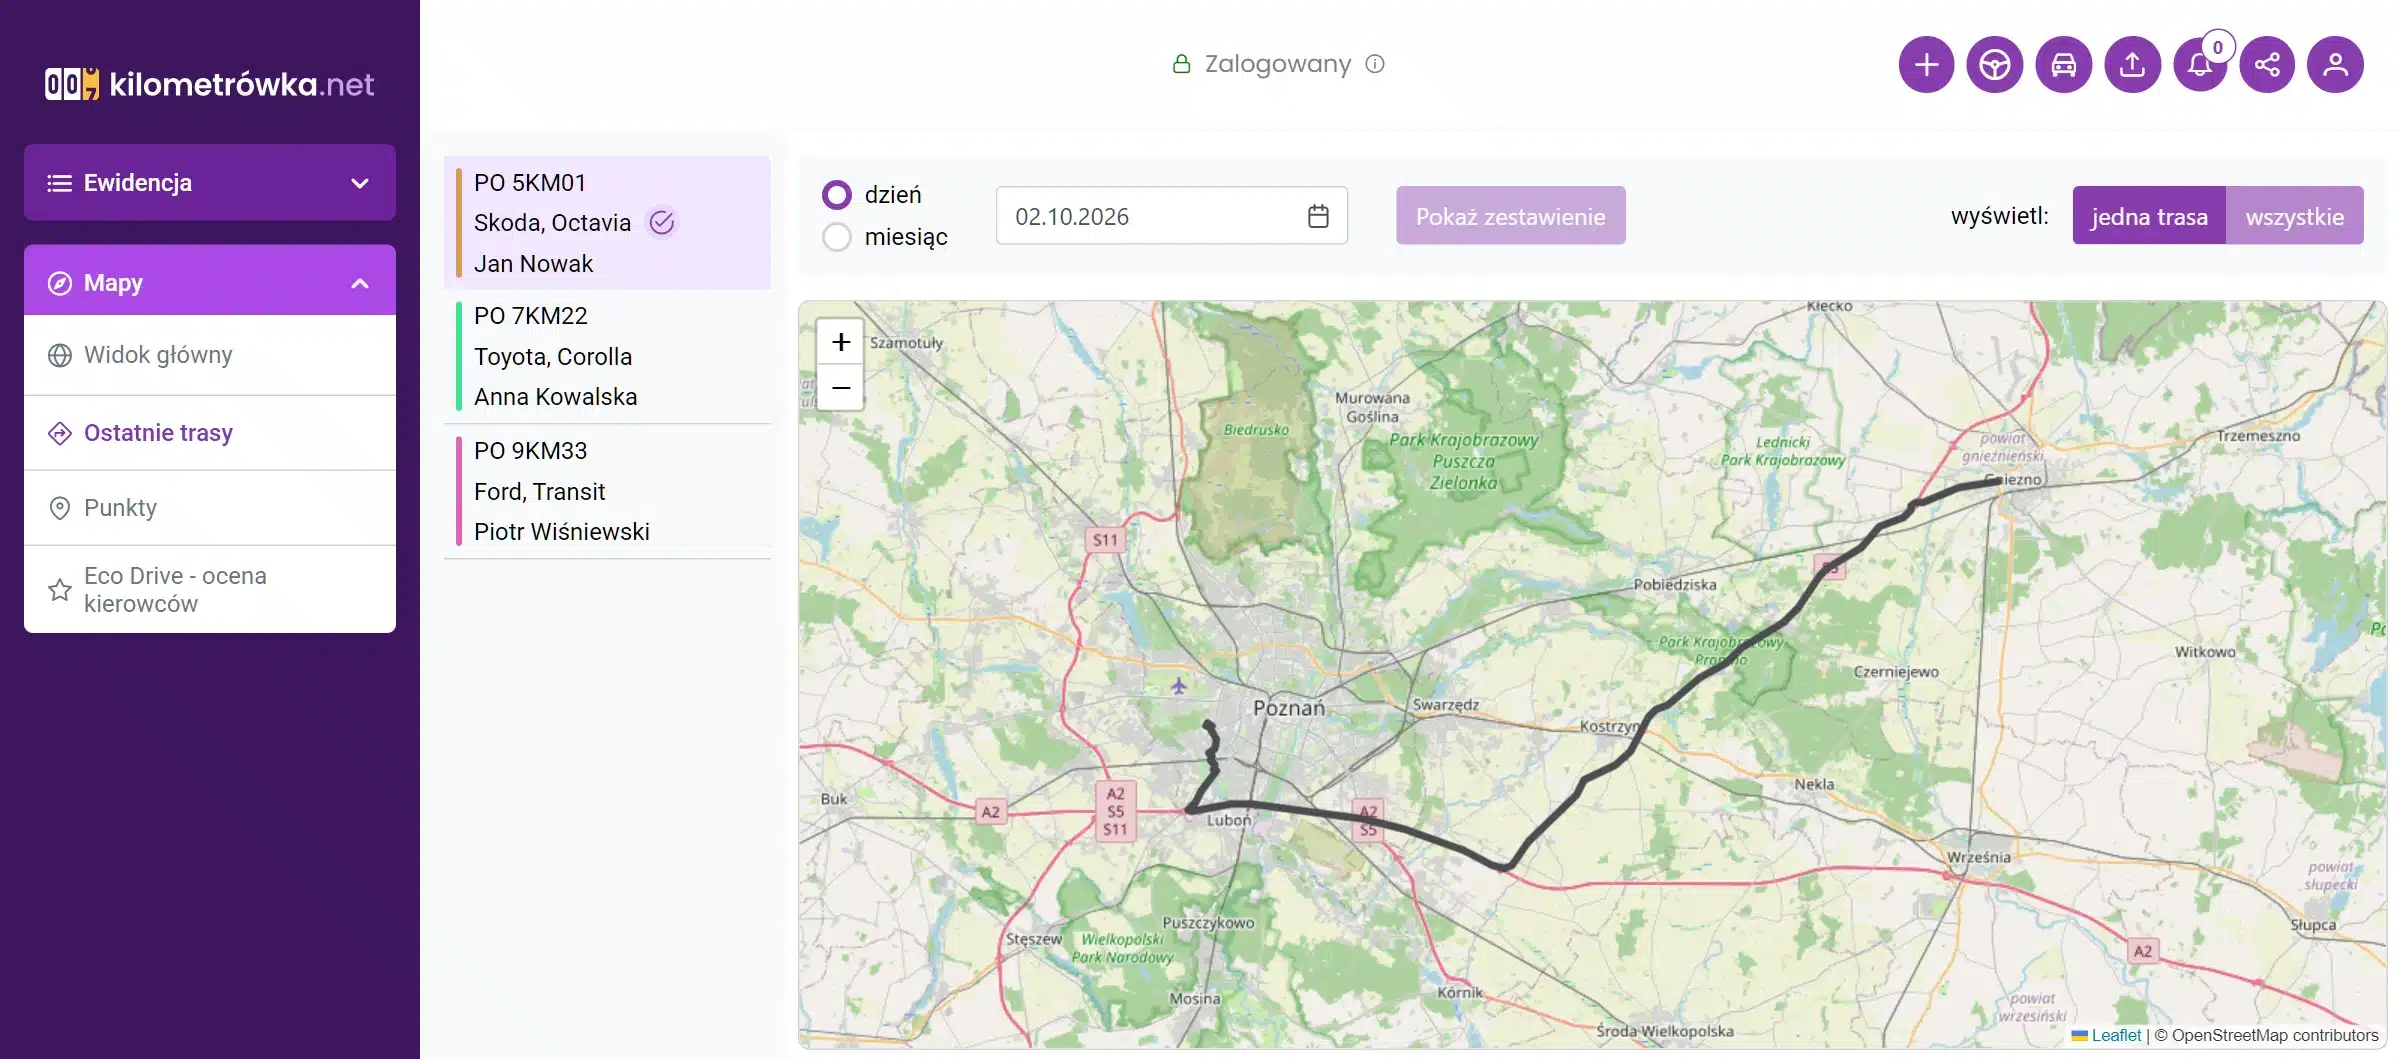
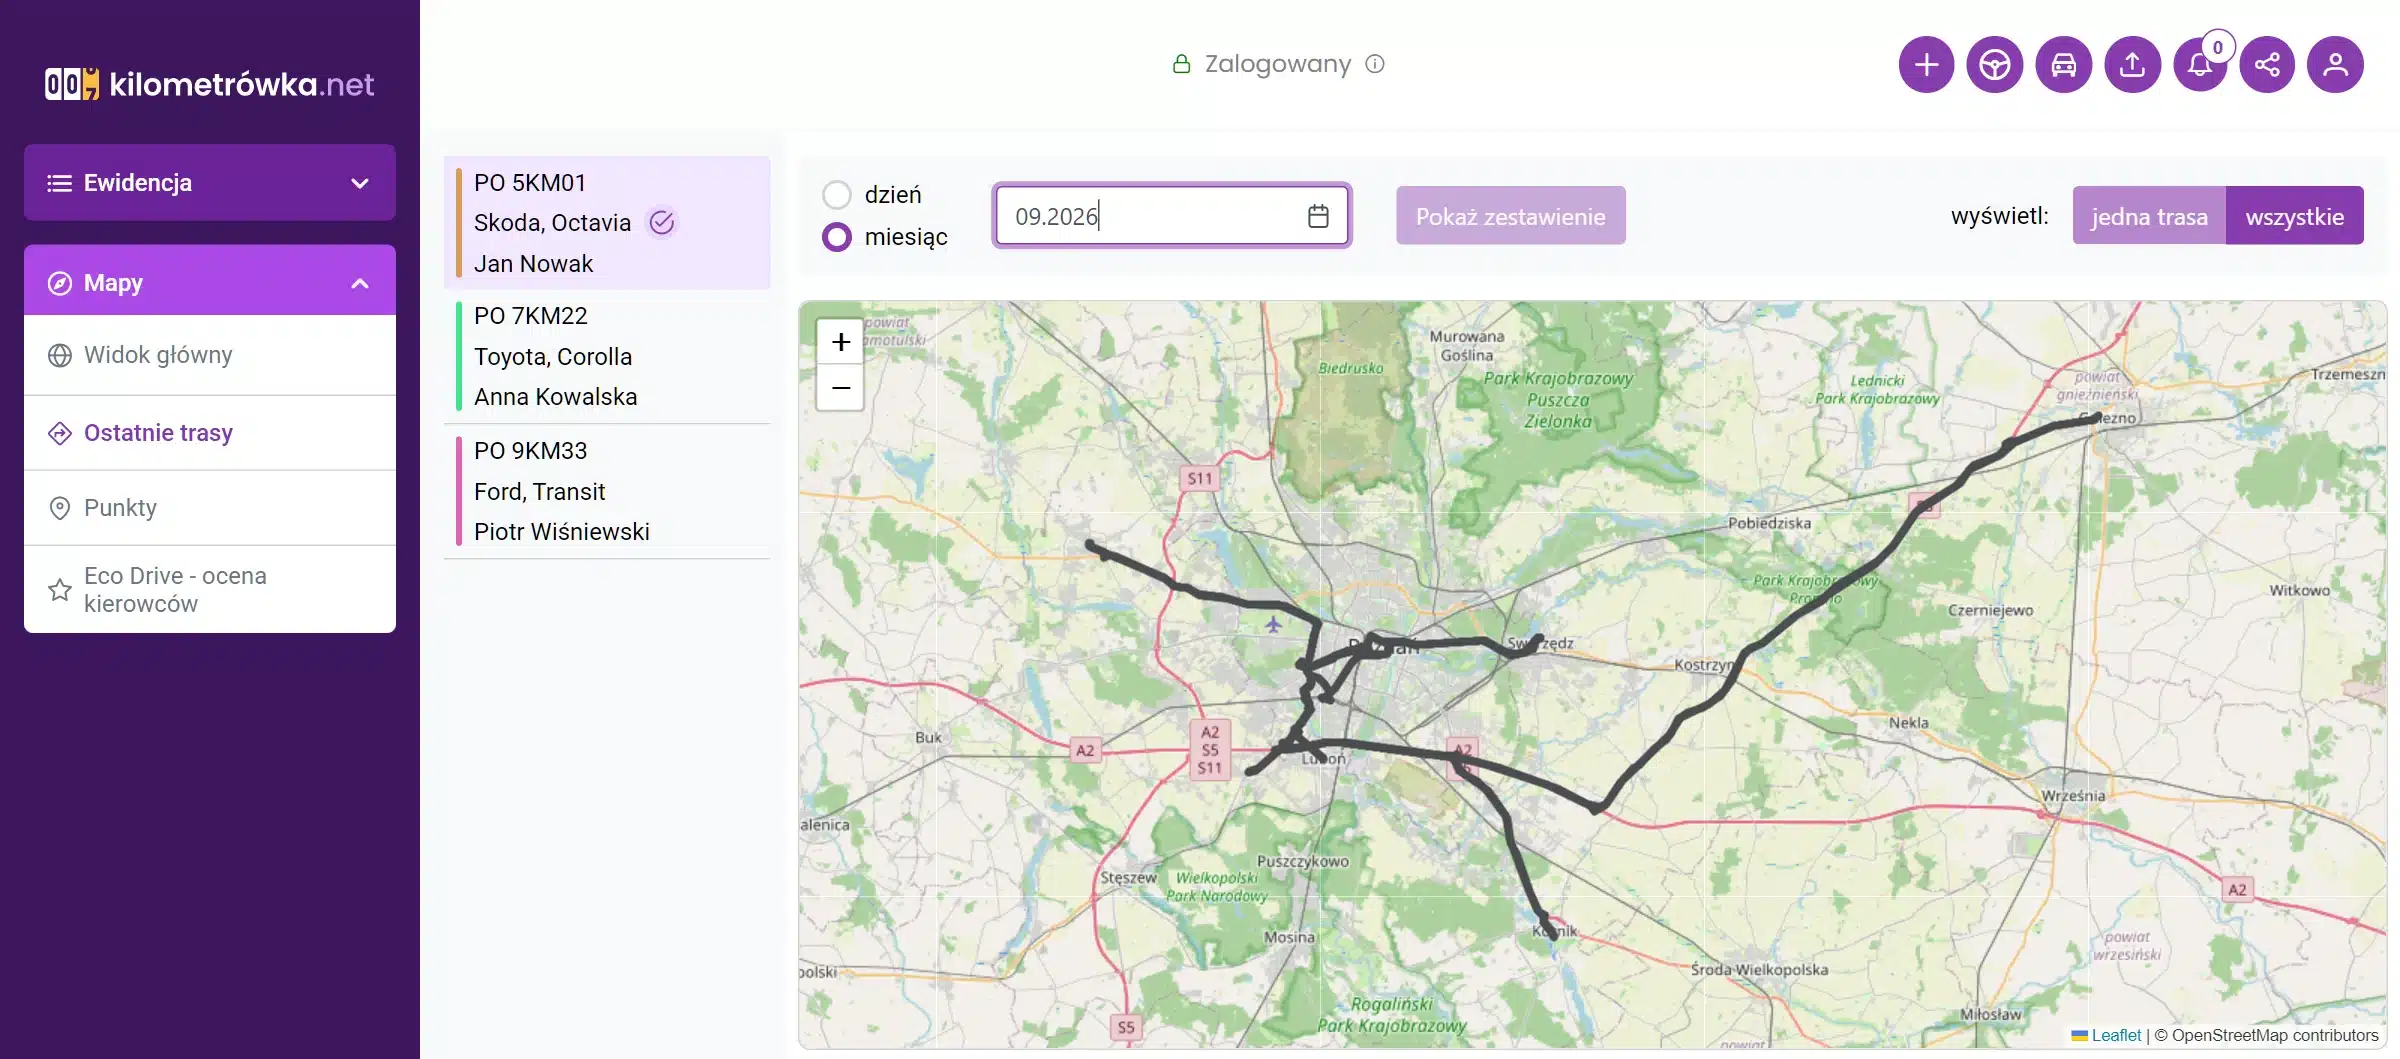
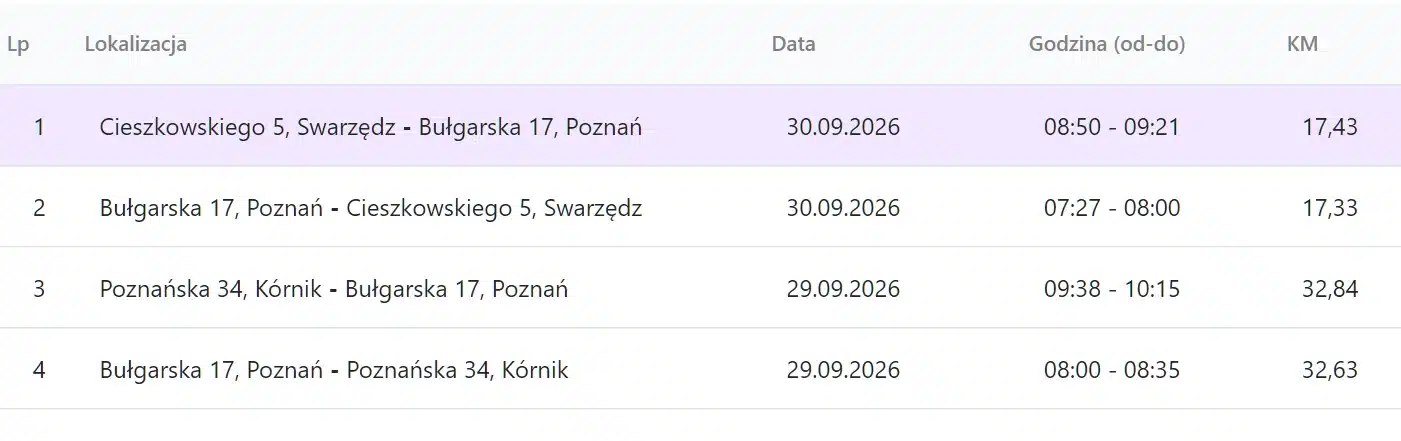
Below the map is a list of trips for the selected period: origin–destination, date, departure and arrival times, and kilometers, with a summary at the bottom. Clicking on a row displays that trip on the map.
Eco Drive – How Drivers Drive
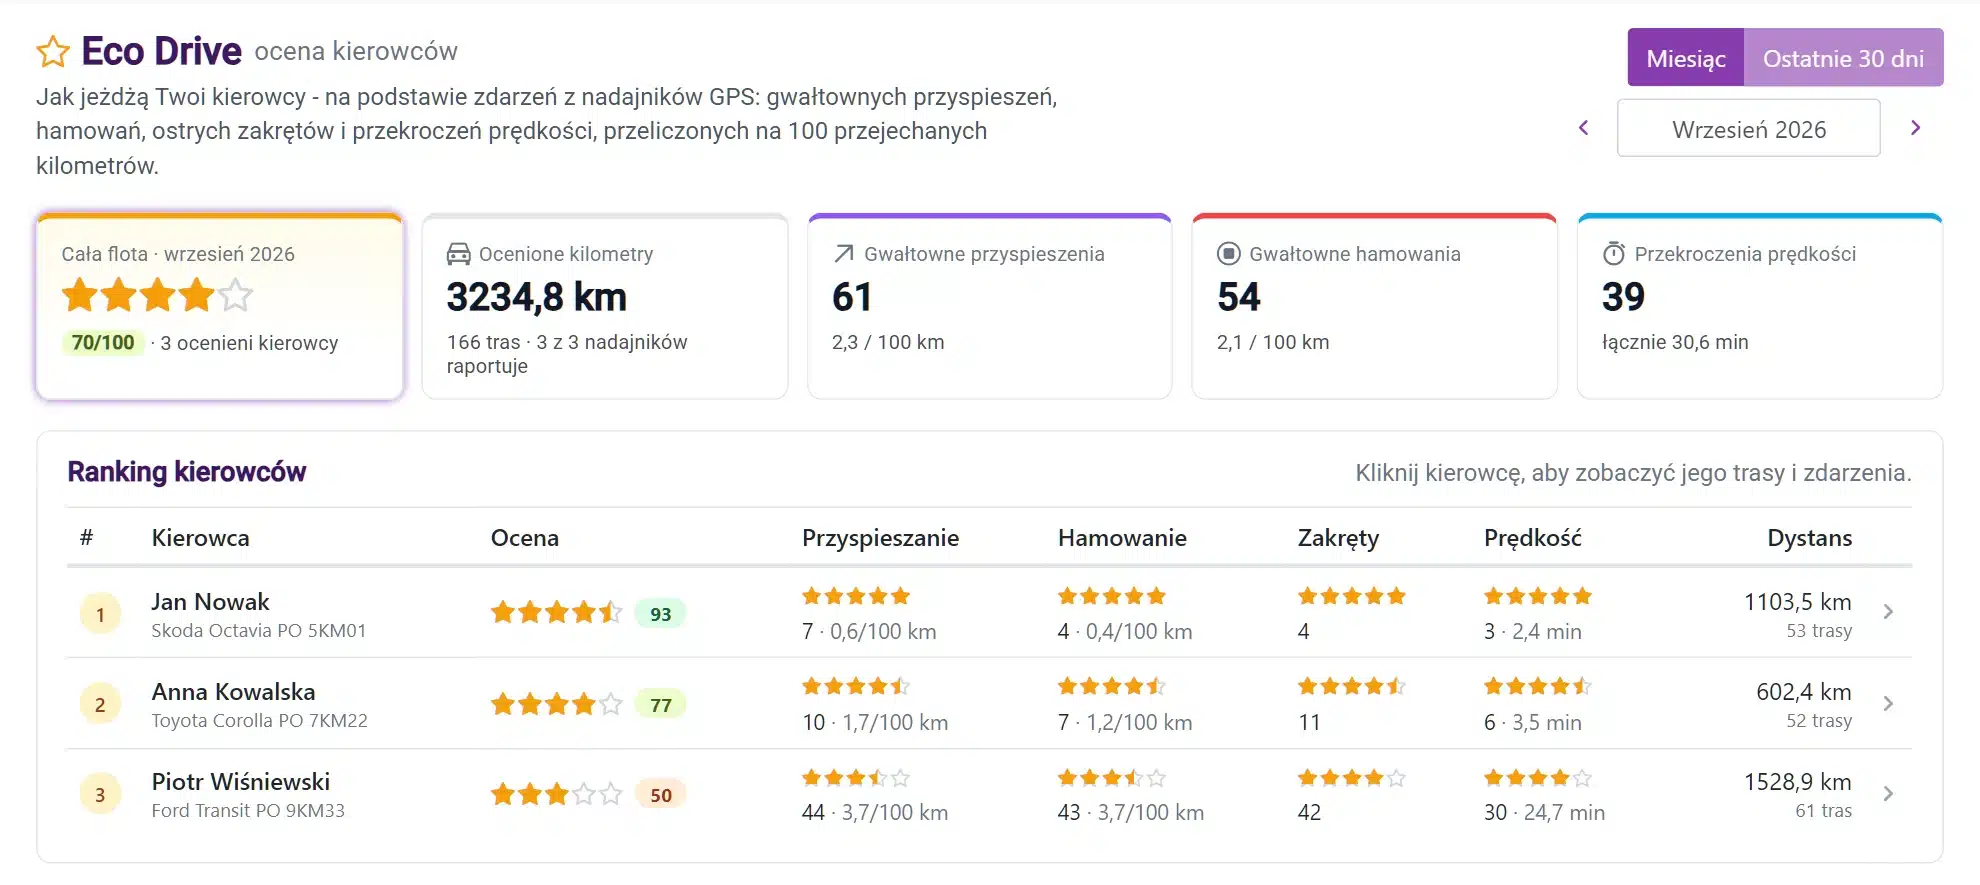
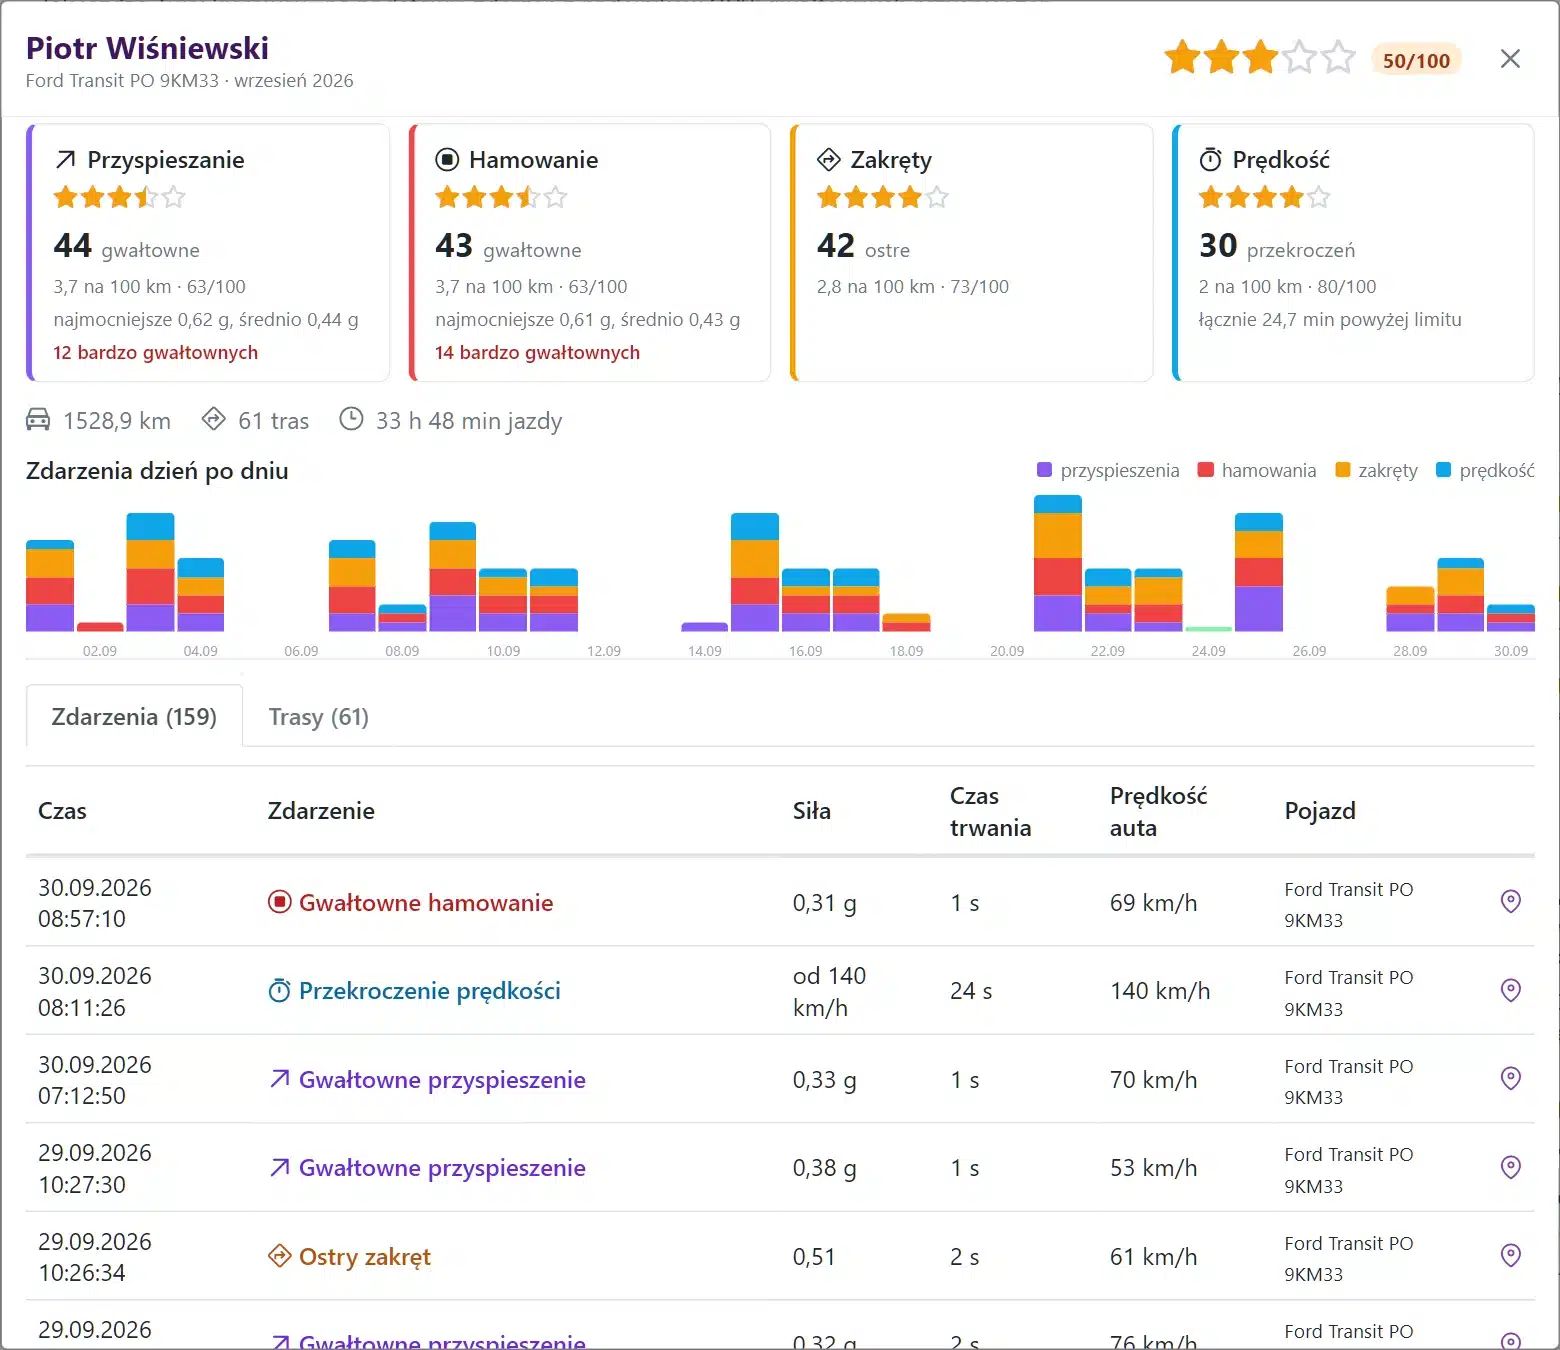
The transmitter records not only the route but also the driving style. Eco Drive converts this into a simple star rating— for each driver and for the entire fleet.
The rating is based on four factors, calculated per 100 kilometers driven:
- sudden accelerations,
- sudden braking,
- sharp turns,
- speeding – above the speed limit set for the car (130 km/h by default).
The fewer such incidents, the more stars—from 1 to 5. You can find the ranking at Maps → Eco Drive – Driver Ratings, for a selected month or the last 30 days.
Driver Details
Click on a driver in the rankings to see how their rating was calculated: stars in each category, a graph showing events day by day, and a list of events with the time, force, and speed of the car. The pin icon opens the incident location on the map. In the tab Routes Here is a list of the driver's trips from that period.
The employee can only see his own car
You can invite a driver to the app and assign them to a specific car. They will then see only the mileage and routes for that car—without any other vehicles, drivers, or their trips.
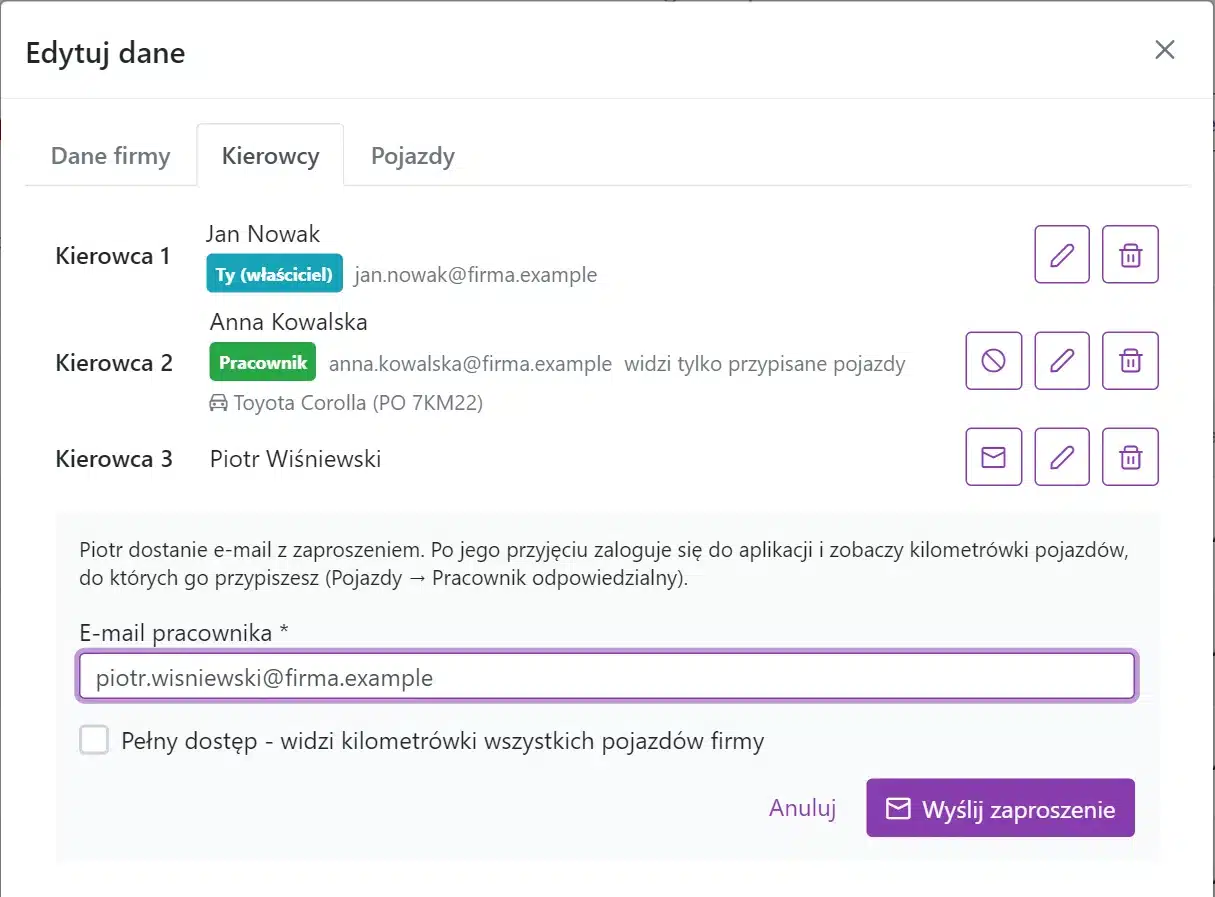
Step 1: Invite an employee
Click the steering wheel icon at the top of the screen (Edit the list of drivers and employees). Next to the driver, click the envelope icon, enter their email address, and send the invitation. Leave the „Full Access” field marked – In that case, the employee can only see the vehicles assigned to them.
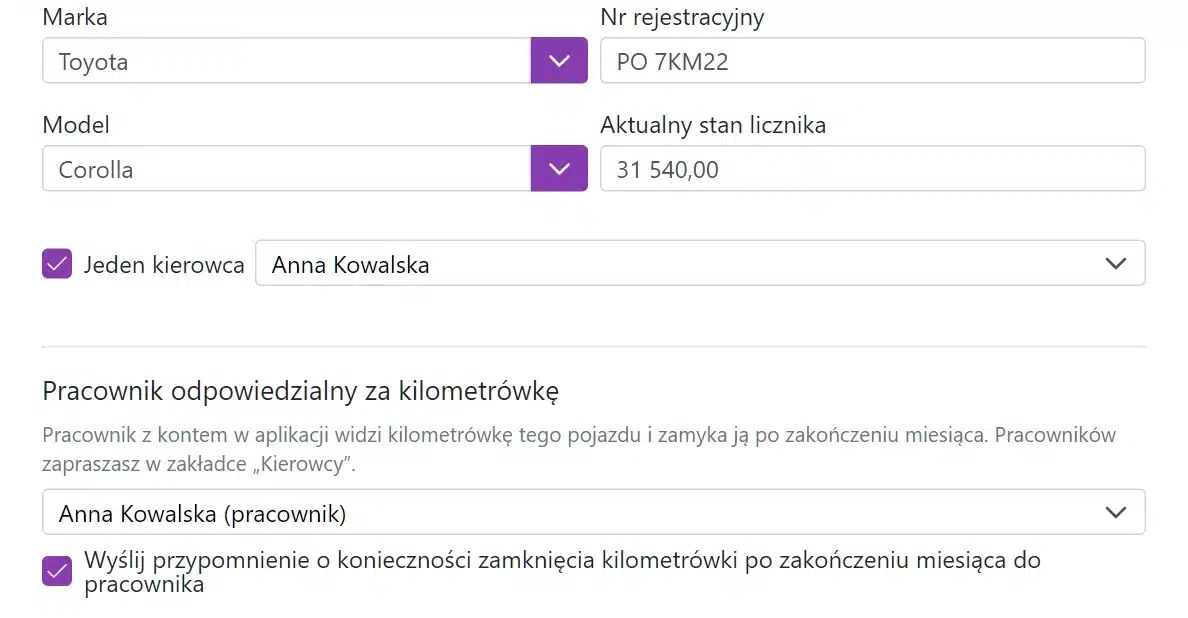
Step 2: Assign it to a car
Click the car icon at the top of the screen (Edit the list of vehicles), open the vehicle and in the section Employee responsible for mileage reimbursement Select an employee. You can also enable a reminder—at the end of the month, the employee will receive an email asking them to close their mileage log.
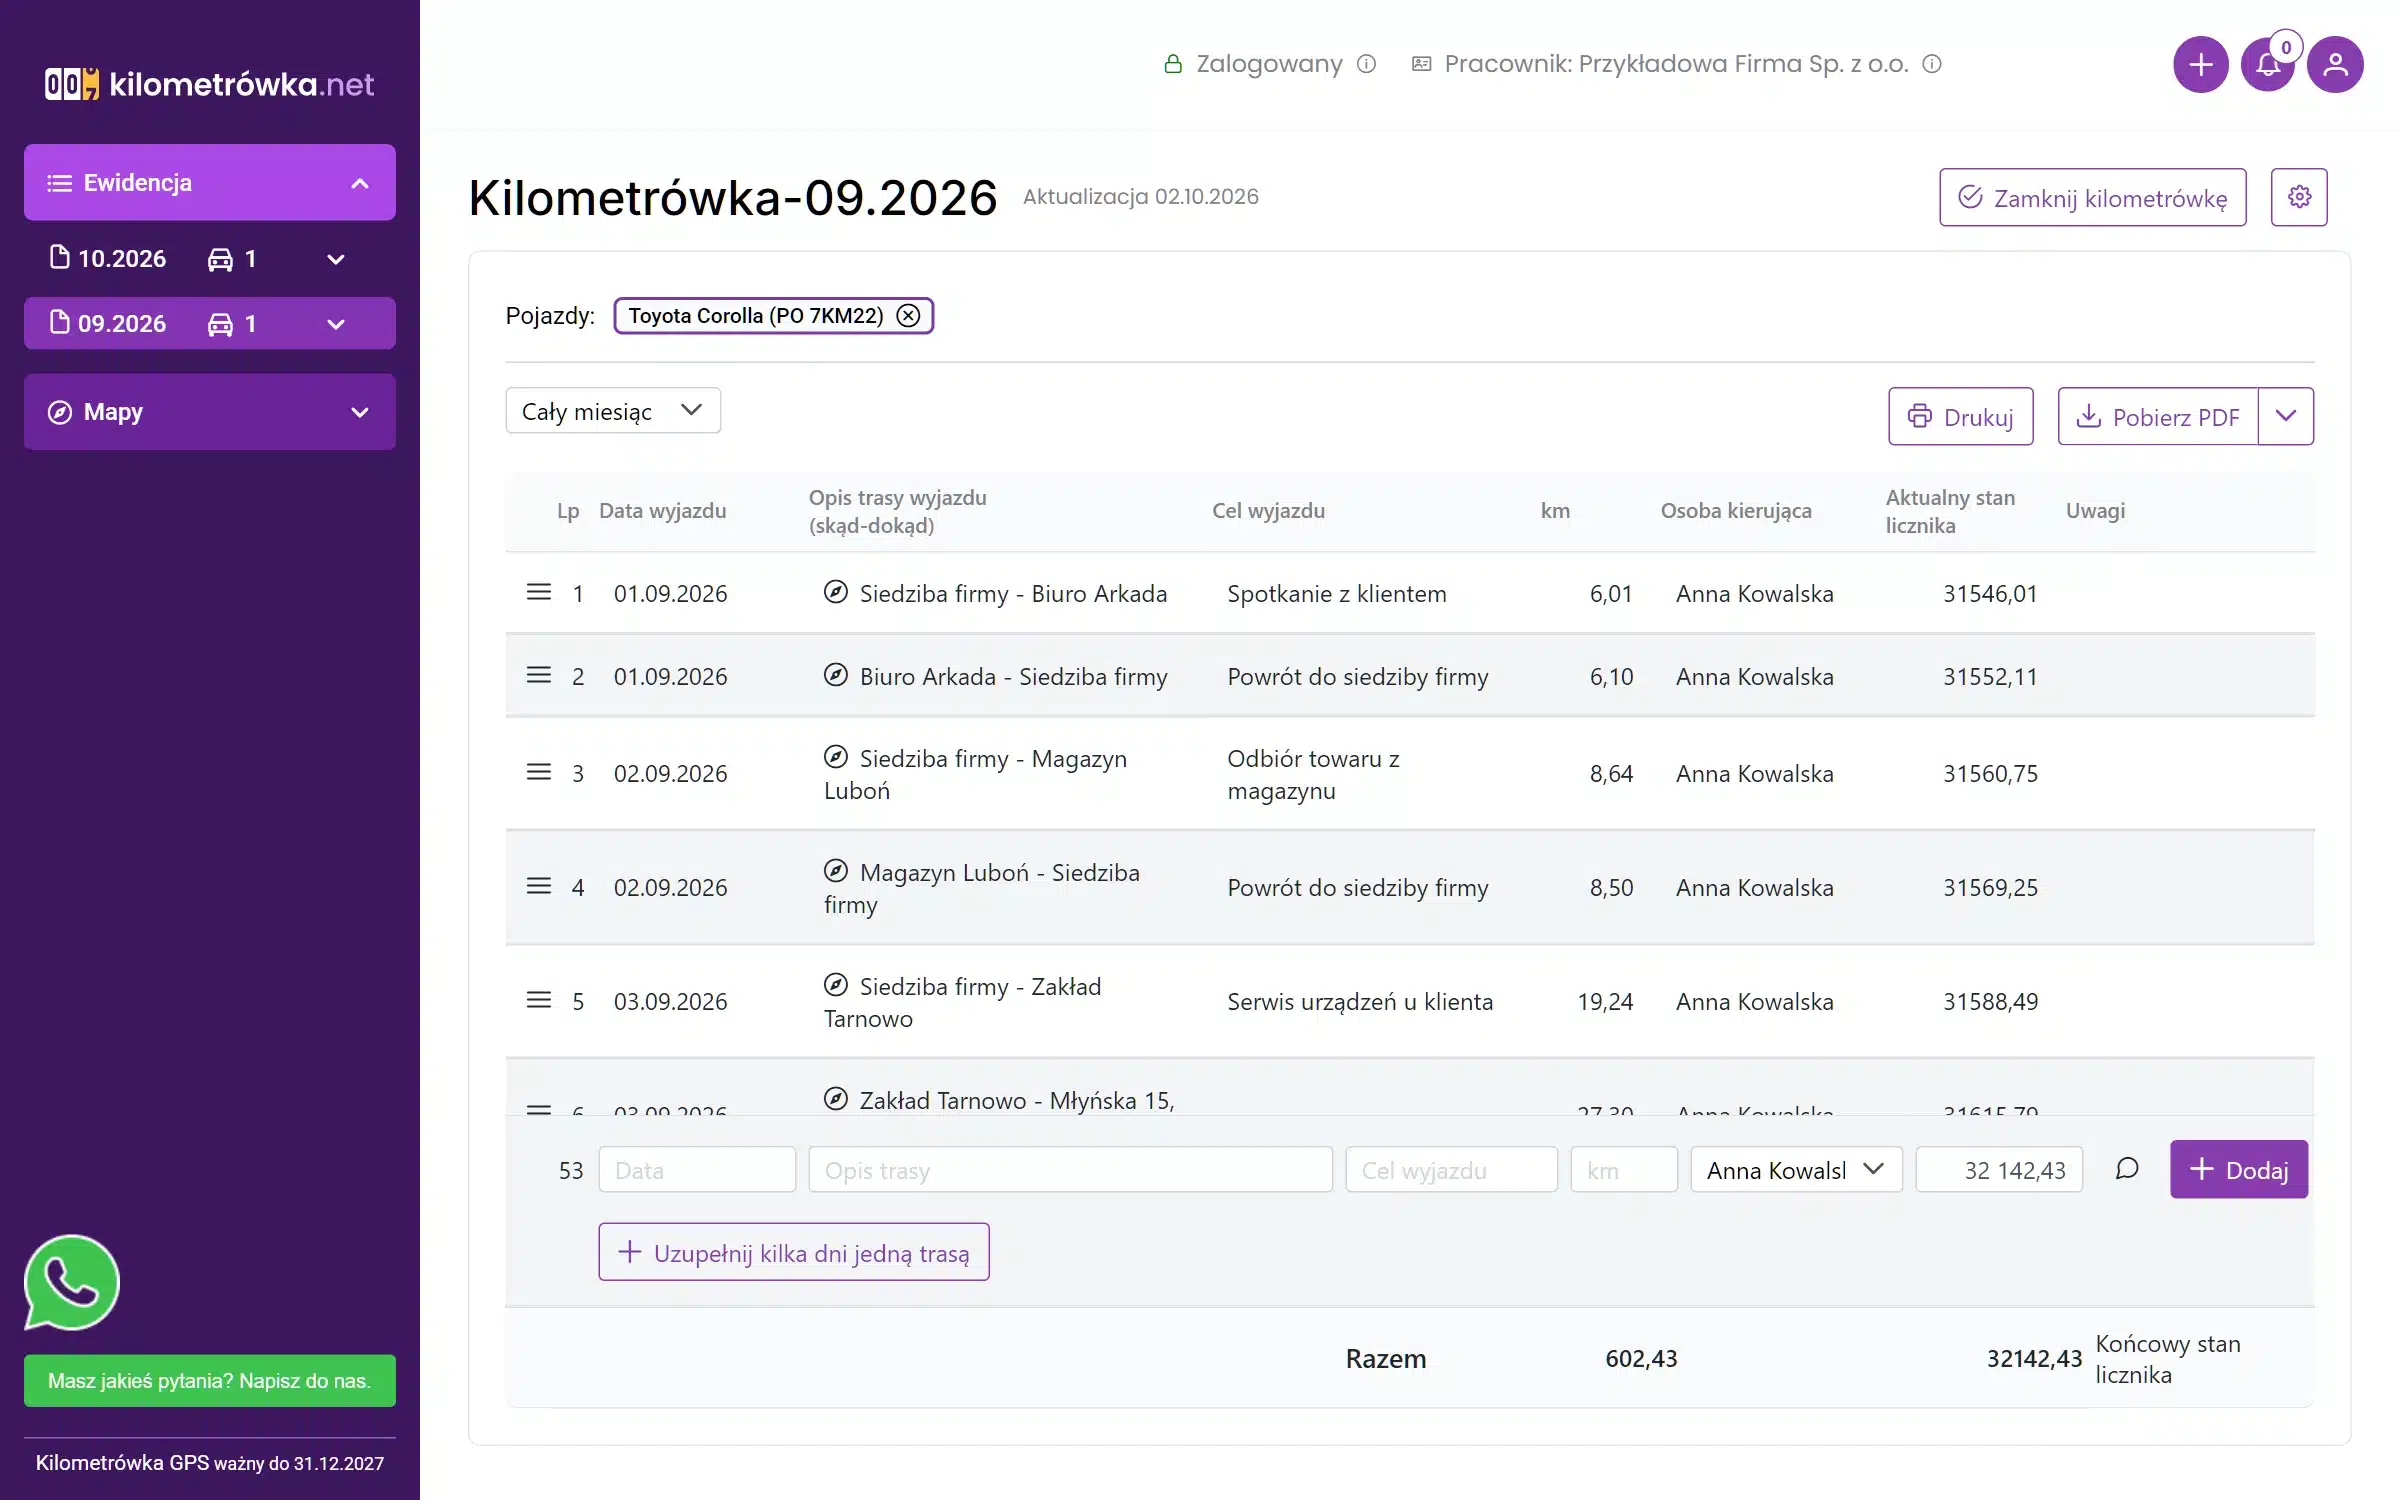
What an employee sees after logging in
At the top of the screen, there is a message indicating that he is logged in as a company employee. In the records and on the maps, he sees only his own car.
| What We See and What We Can Do | Owner | Employee assigned to the vehicle |
|---|---|---|
| Mileage and Routes for Your Car | yes | yes |
| Reaching the first kilometer milestone on your car after a month | yes | yes |
| Mileage, locations, and routes of the other cars | yes | no |
| List of drivers and vehicles, inviting employees | yes | no |
| Adding and Changing Points | yes | no |
| Eco Drive – Driver Ratings | yes | no |
At a Glance
- Routes from the GPS transmitter themselves are entered into the mileage log—with the date, addresses, mileage, and odometer reading.
- Points You name it once; after that, the repeated routes and returns to the company are self-explanatory.
- Merging combines several short trips into a single post.
- On map You can see where the cars are and which way they went—day by day or for the entire month.
- Eco Drive shows drivers' driving styles using stars.
- Employee A driver assigned to a car can only see their own car and their own routes.
Do you want a mileage log that fills itself out?
Create an account, order a GPS tracker for your car, or contact us—we'll help you get started.
Create an account GPS Transmitters in the Store Send a message on WhatsAppThe screenshots show a fictional company—the names, people, and routes are made up. Maps: © OpenStreetMap.
 English
  Polish
  Ukrainian